When you want to stand out on a crowded convention floor, traditional poster boards just will not do. Attendees walk past hundreds of booths, and everything starts to blend together. Because of this, we provide cutting-edge, high-impact digital solutions to help your business get noticed. We are the premier choice for high-resolution displays that draw crowds and make an impact. Whether you need a massive backdrop or a fully custom setup, we have you covered. We have everything you need for your SEMA show video wall rentals.
Transforming Your Next Event: Premier Trade Show Solutions
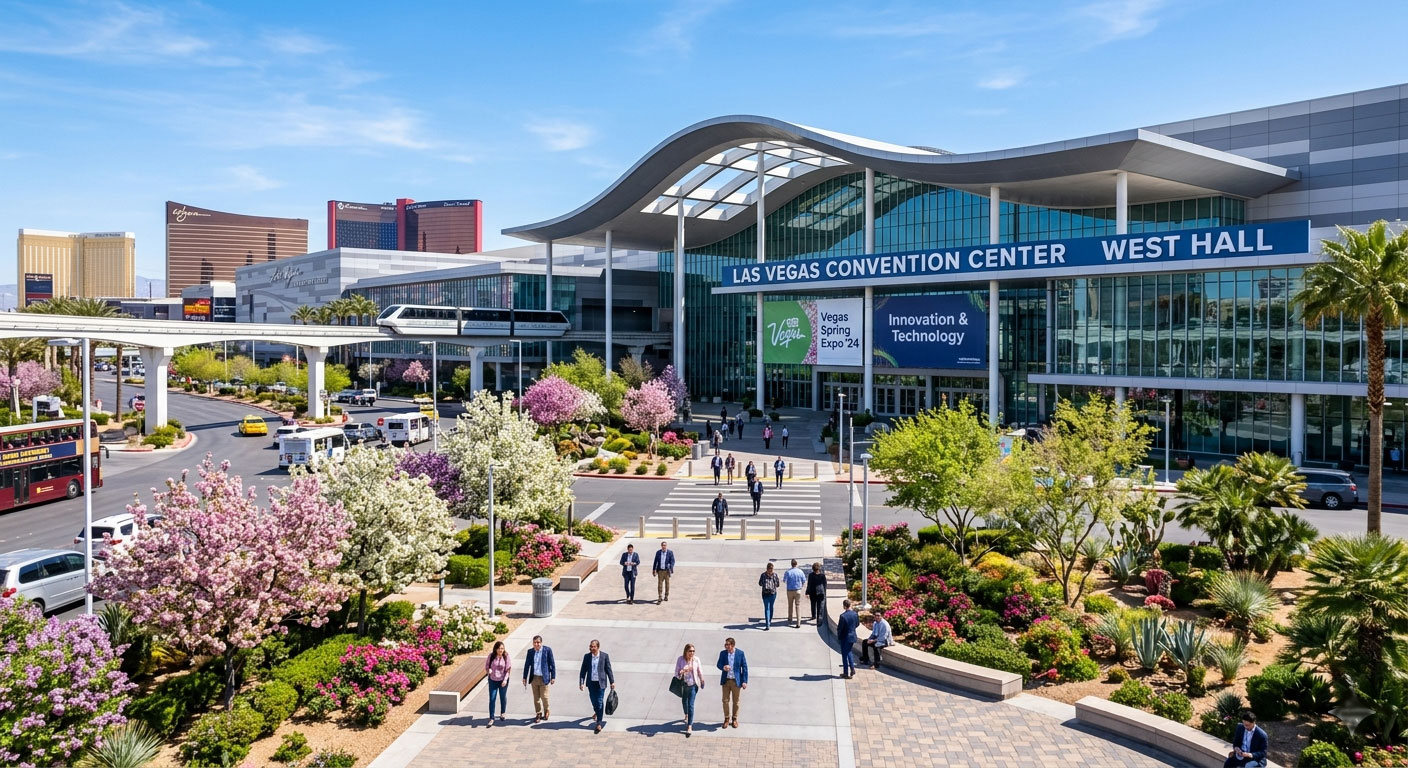
Stand Out in Las Vegas with Sema Show LED Video Wall Rentals
The automotive aftermarket world is incredibly competitive, and the showroom floor in Las Vegas is massive. If you are preparing for this major event, you need to bring your absolute best presentation. For this reason, we offer specialized Sema Show LED Video Wall Rentals to help you dominate the room.
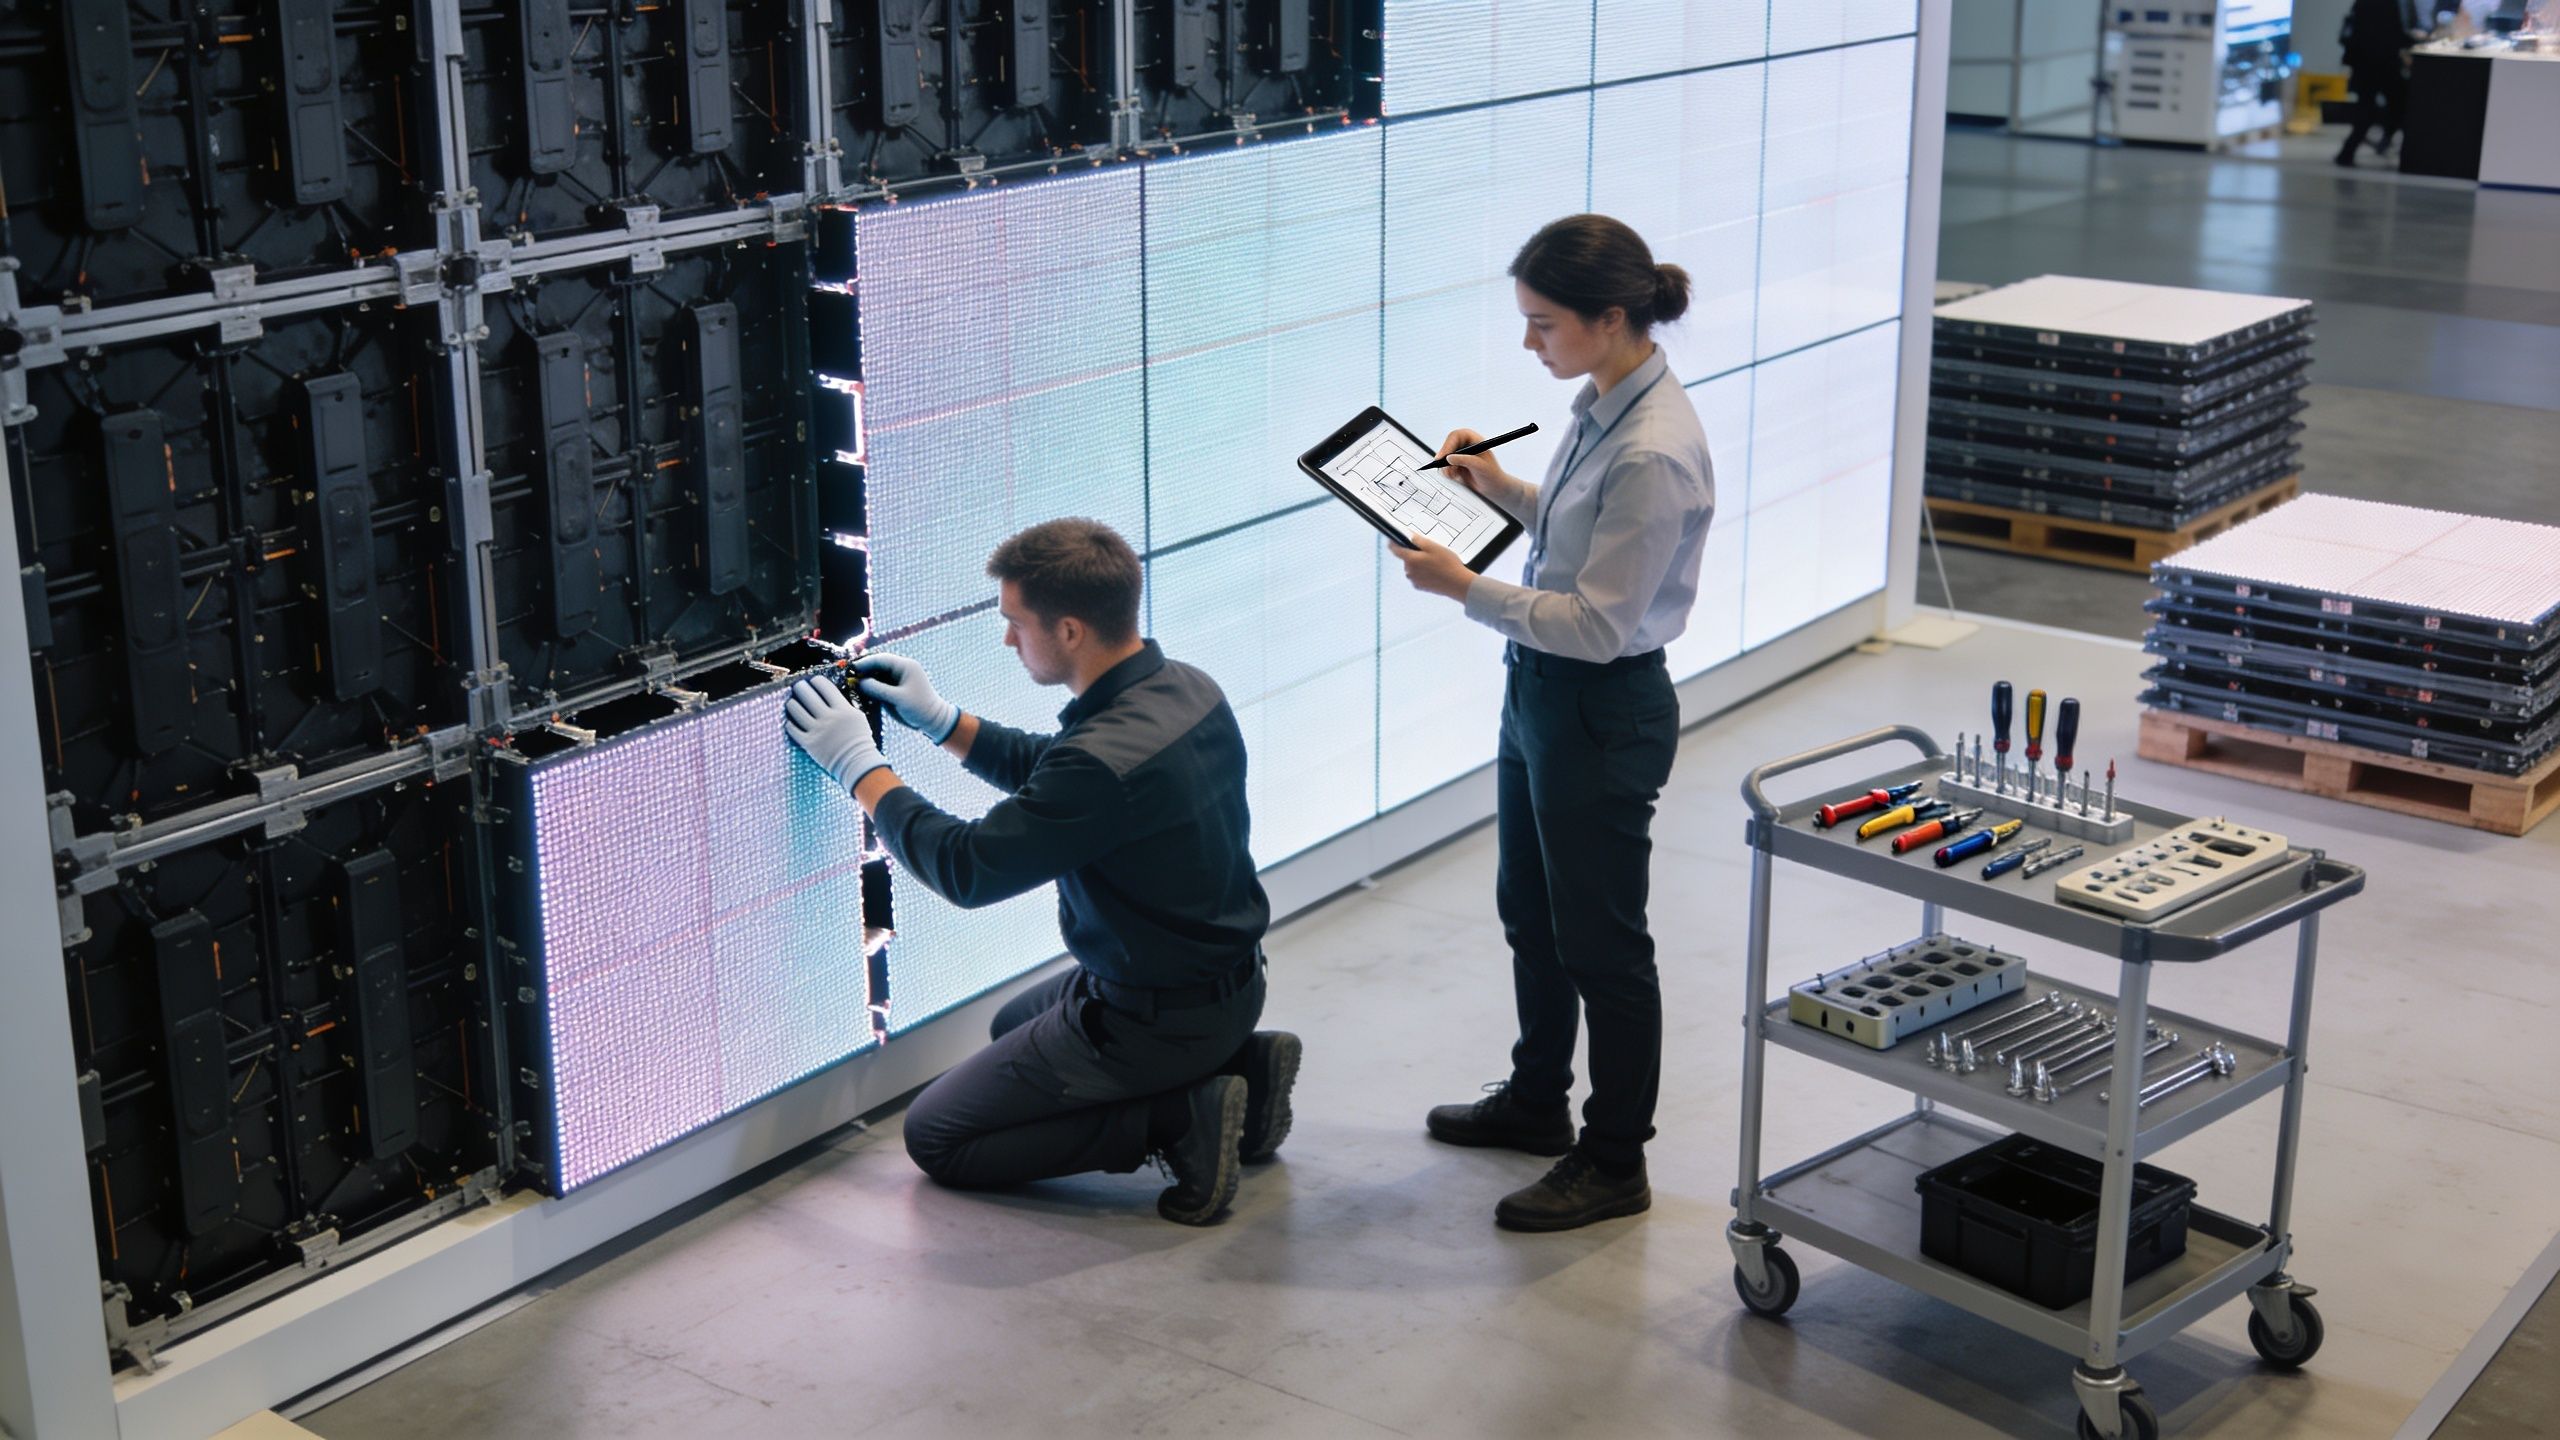
Traditional banners are static and boring. In contrast, our premium LED walls bring your vehicles, parts, and brand story to life with vivid motion. Because we use seamless technology, your videos look flawless from every angle. We build these displays using custom-sized panels that lock together perfectly. Therefore, you will never have to worry about ugly gaps, messy cables, or distracting metal trusses.
When you choose our Sema Show LED Video Wall Rentals, you get a complete, stress-free experience. First, we custom design the layout to fit your exact space. Next, our expert staff handles the transportation and assembly. Finally, we keep a technician nearby during the entire show. Consequently, your display runs smoothly, and your team can focus entirely on greeting new clients.
Engineering the Best Automotive Trade Show Displays
Cars and trucks are dynamic, so your marketing should be dynamic too. We specialize in building the ultimate automotive trade show displays that match the power of your brand. We do not just hang screens on a wall; instead, our advanced LED panels actually become the walls of your booth.
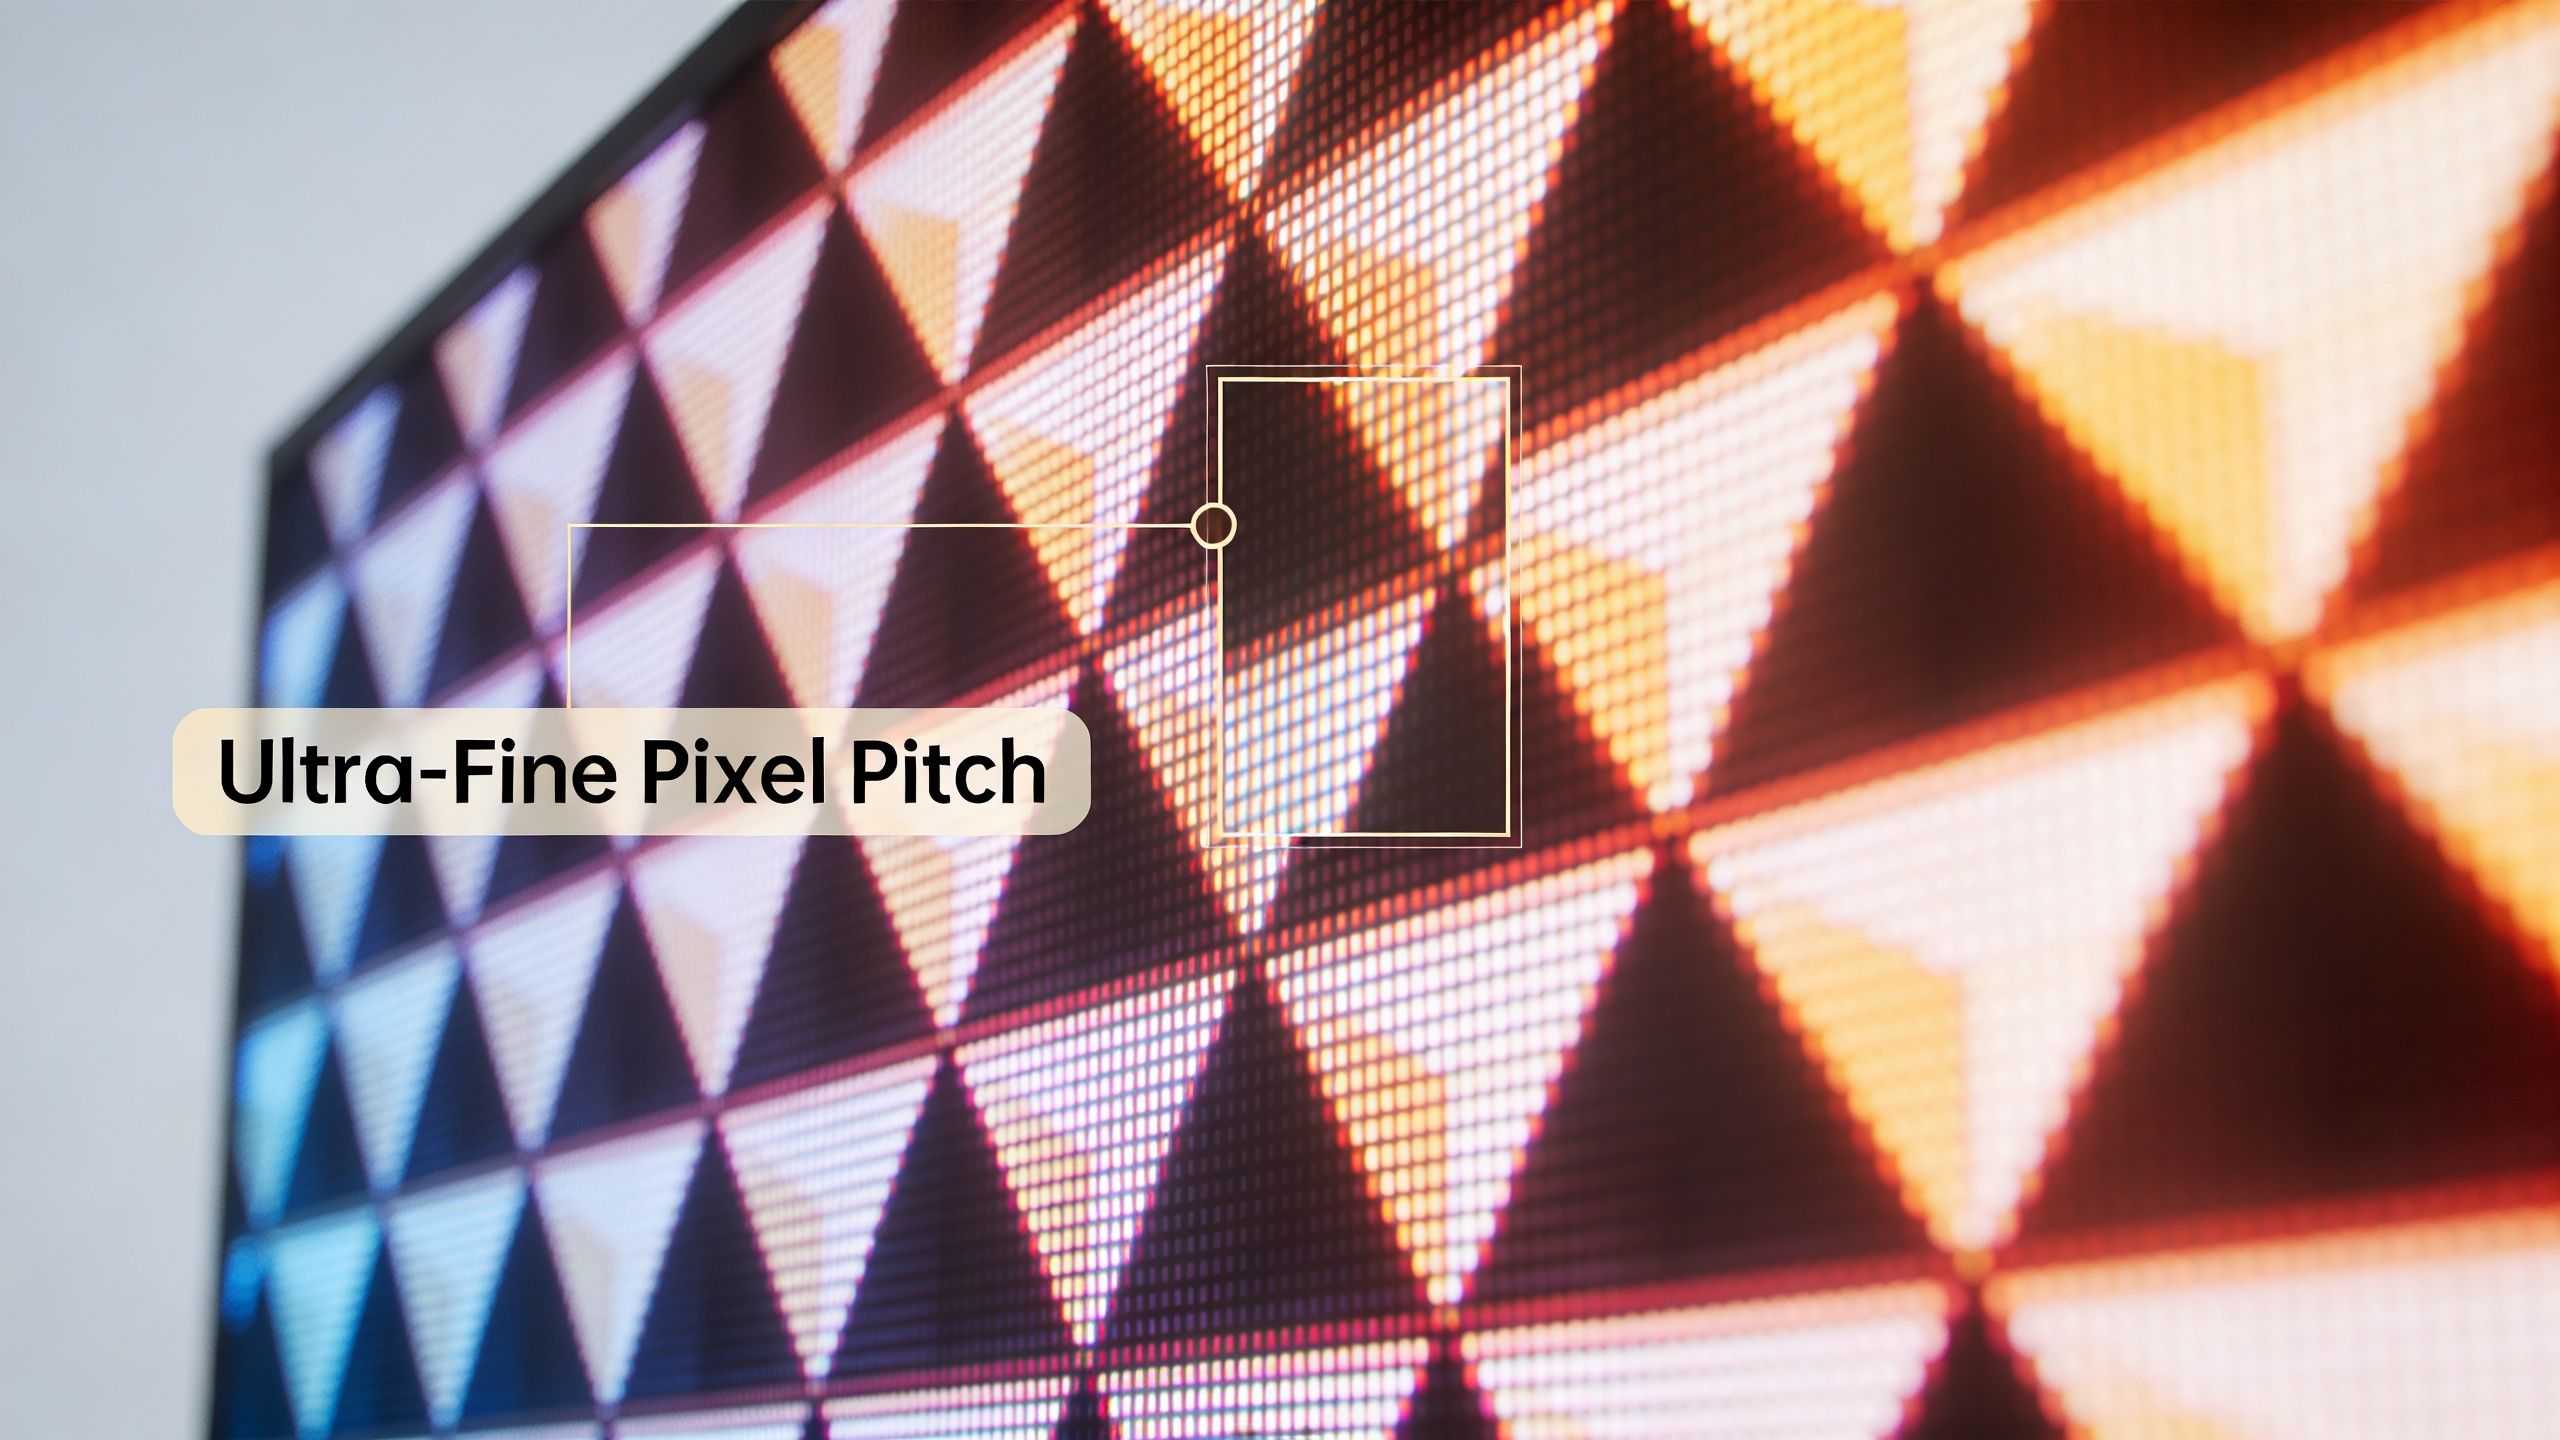
Because our specialized screens feature ultra-fine pixel pitch technology, attendees can stand right next to the display and see sharp, crystal-clear images. This means you can show high-definition videos of your products in action, highlight close-up mechanical details, or run thrilling race footage. For instance, we can build flat backwalls, seamless 90-degree corners, and beautiful curved structures. As a result, your SEMA show video wall rentals transform into an immersive showroom.
When designing automotive trade show displays, we know that flexibility is key. If you have a large island space, we can create an elaborate four-sided tower. On the other hand, if you have a smaller space, we offer compact ten-foot video wall rentals. No matter the size, we ensure your booth looks professional, clean, and modern.
Why Choose Us for Your Next SEMA Show Video Wall Rentals?
Investing in your own digital hardware is risky because technology changes very fast. For that reason, our rental program is the most practical and economical choice for smart exhibitors. Here is how we make your next Sema show video wall rentals a massive success:
No Tools Required: Our modular system uses high-powered magnets and simple locking handles.Because of this, our booths assemble incredibly fast. As a result, you’ll save on labor costs.
Lower Operational Costs: Since our advanced panels support themselves without bulky metal trusses, you save a significant amount of money on shipping, drayage, and warehouse labor.
One-Stop Content Creation: We began as a technology and media agency decades ago. Therefore, we can design both your physical booth layout and create stunning motion graphics for your screens.
We are fully committed to providing concierge-level service to every single client. Whether you are a brand working with us directly or an advertising agency looking to impress a customer, we have your back.
Are you ready to leave your competition behind? Contact us today about your SEMA show LED video wall rentals and let us build a spectacular display for your next event!
Are you preparing for the biggest tech event of the year? If so, you already know that the Consumer Electronics Show is the ultimate battleground for global innovation. Because thousands of brands compete for attention in the same halls, your display needs to be absolutely spectacular. At LED Exhibit Booths, we specialize in turning ordinary convention spaces into unforgettable visual experiences. Through our premium CES Las Vegas LED Exhibit Booth Rentals, our team helps your brand command the attention it truly deserves. Of course, we aren’t new at this. In fact, before video wall trade show booths became popular we had years of experience with custom trade show booths.
Why Dynamic LED Displays Are Vital for CES Las Vegas
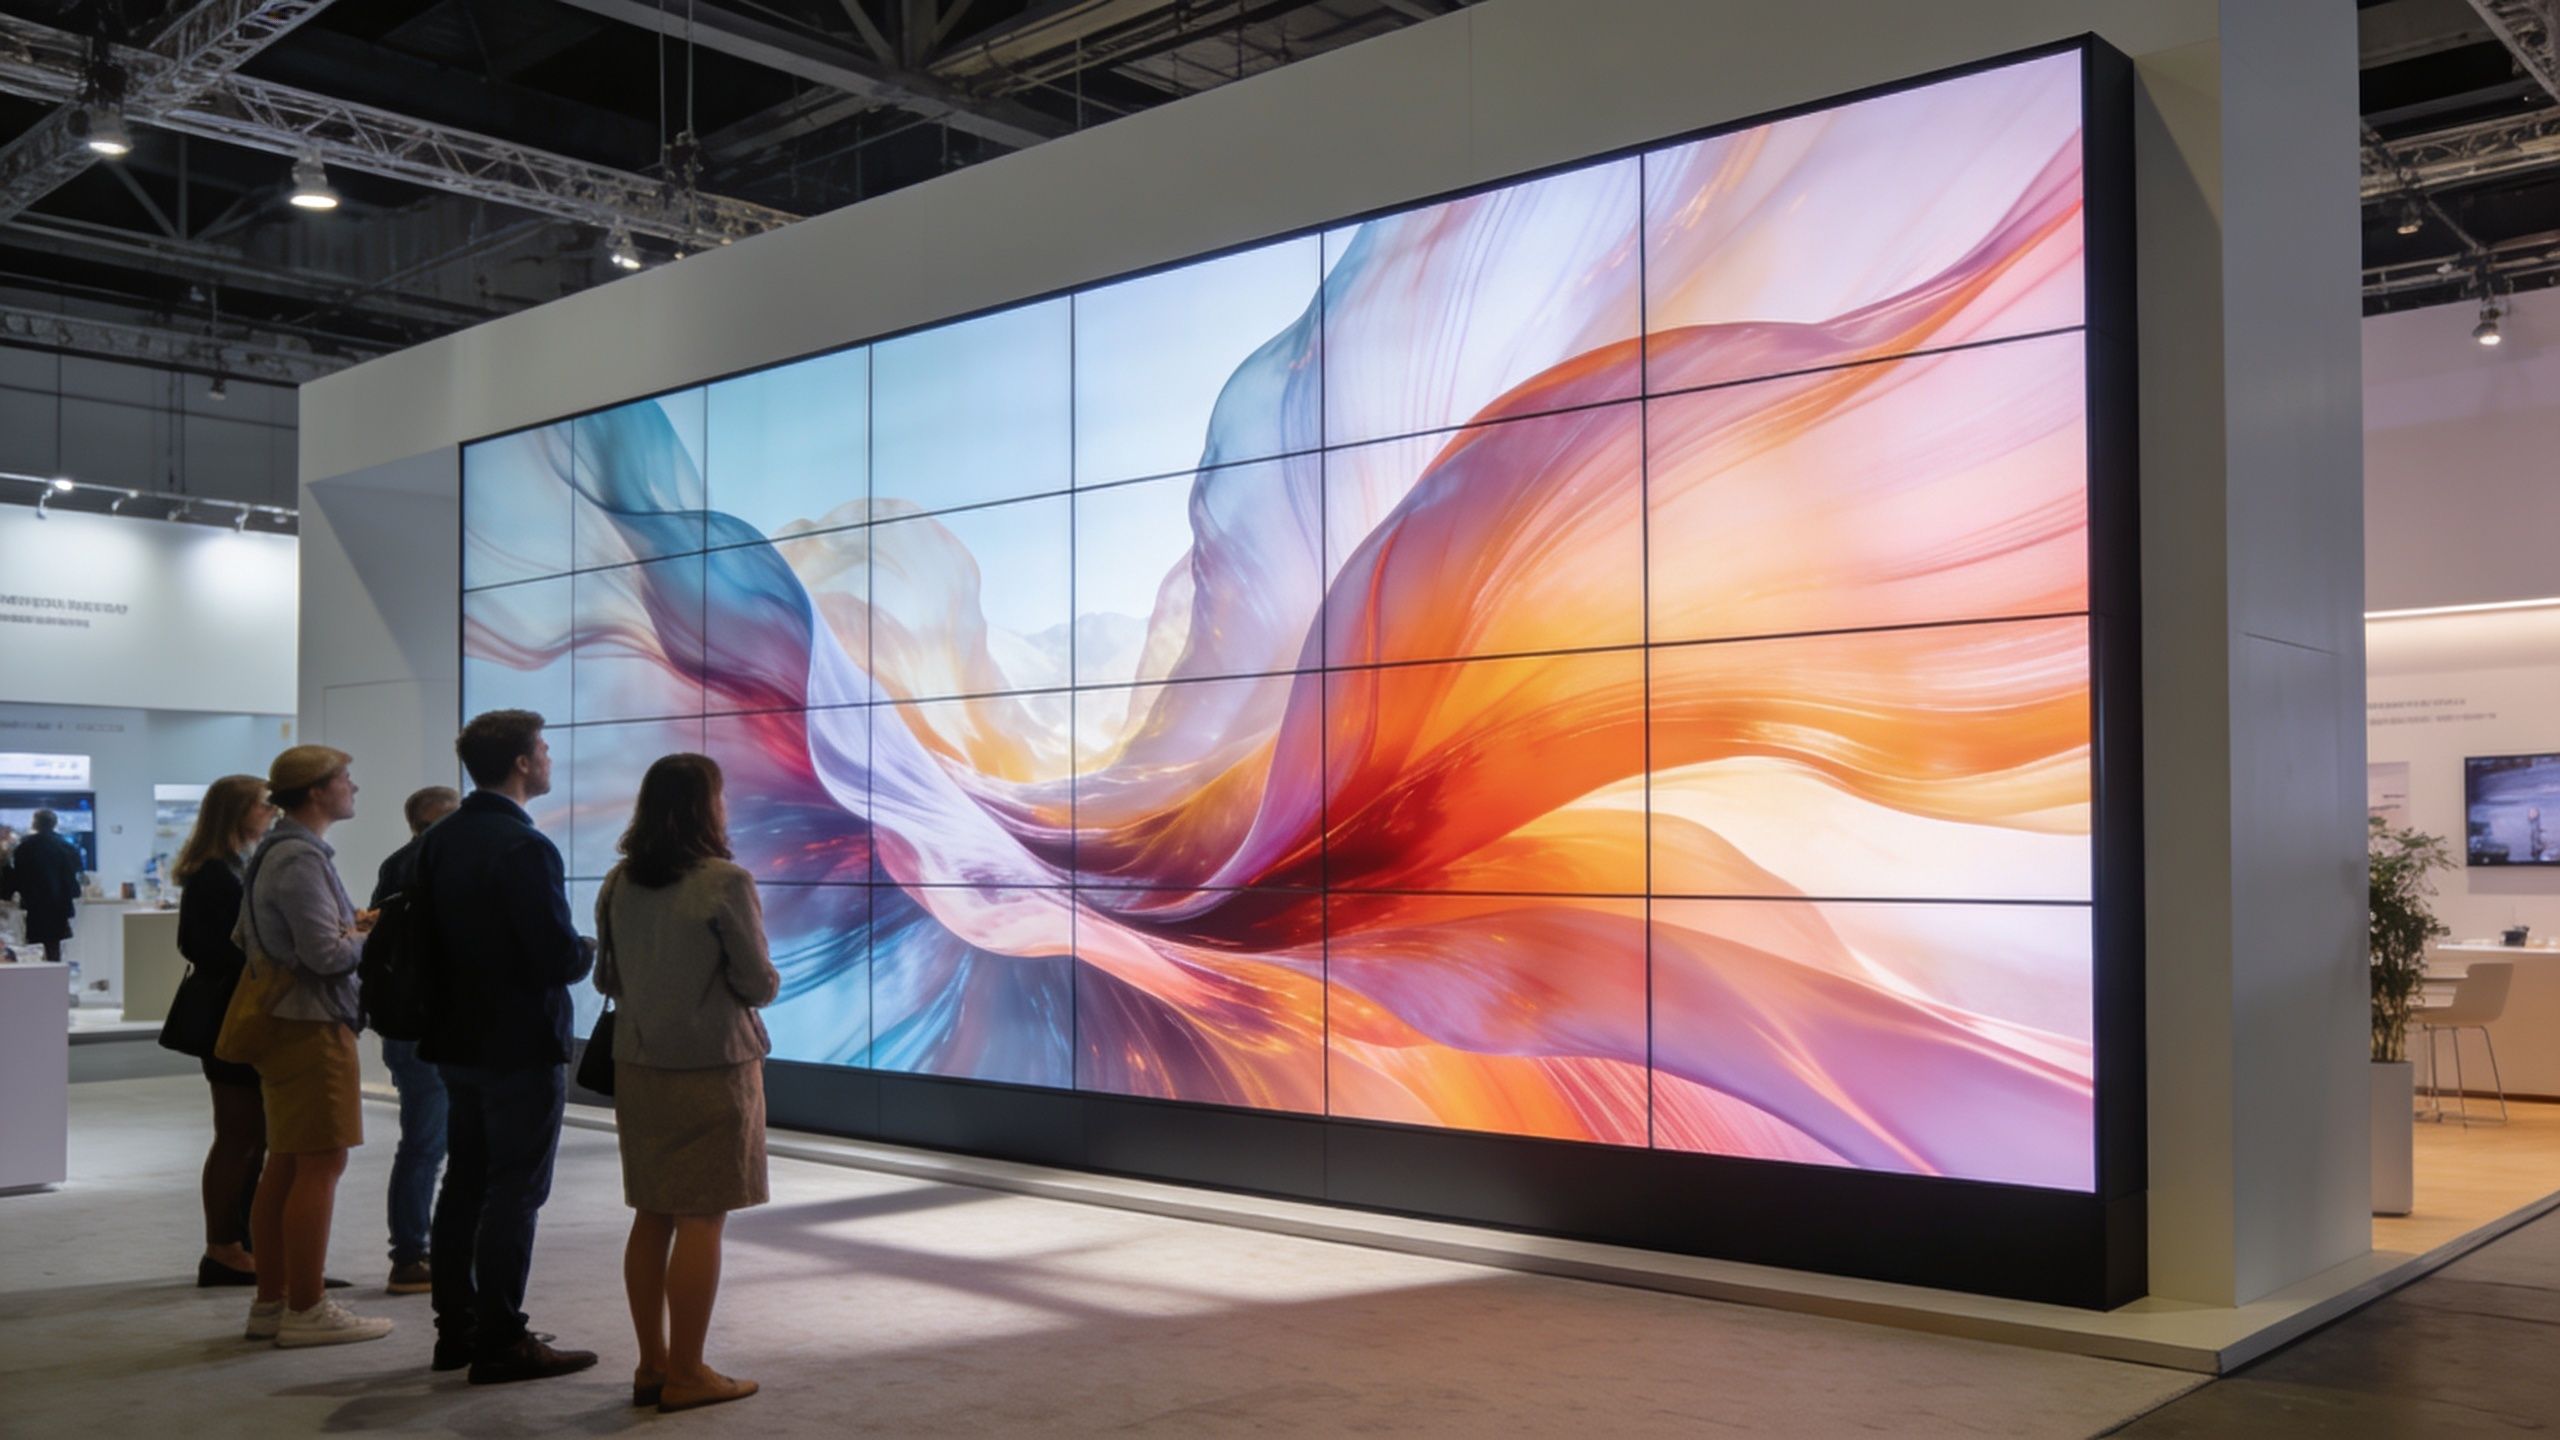
First and foremost, traditional static signs simply cannot compete with the energy of a high-resolution video wall. When attendees walk the floor, their eyes are naturally drawn to movement, vibrant colors, and bright light. Consequently, incorporating seamless LED screens into your setup ensures that your message is visible from across the entire convention center.
Whether you want to showcase crisp product demonstrations, stream live presentations, or display stunning motion graphics, our technology makes it possible. We provide cutting-edge, high-refresh-rate panels that look flawless in person and look equally perfect on camera. This is incredibly important because a massive portion of your CES audience will interact with your brand online through event videos and social media shares. Plus, you can learn more about video wall rental costs. We can also help with video content creation for your video wall.
Master Your Presentation with Custom CES Booth Design
Beyond just renting the equipment, creating a successful exhibit requires a strategic layout. This is exactly where our expertise in CES booth design comes into play. We believe that technology should never feel like an afterthought. Instead, our design specialists work closely with you from day one to integrate vibrant tile configurations directly into the architecture of your display.
For instance, we can build towering pillars, immersive overhead arches, or massive curved backdrops that envelop visitors as they walk into your space. By blending smart structural layouts with creative content, we make sure your booth is both beautiful and functional. As a result of this careful planning, you will have a natural flow that guides visitors smoothly from your main attraction straight to your sales representatives.
Comprehensive, Stress-Free Rental Services
Planning for a massive trade show in Nevada can definitely feel overwhelming. Therefore, our goal is to handle all the heavy lifting so you can focus entirely on your clients and product launches. When you partner with us for your CES Las Vegas LED Exhibit Booth Rentals, you receive a truly comprehensive service package.
Custom Content Optimization: We review your videos and graphics ahead of time to guarantee they match the exact aspect ratio of your video walls.
On-Site Logistics and Setup:Our local technical crews manage the entire transportation, assembly, and fine-tuning process at the venue.
Active Event Support: We stay on standby during the show to ensure your screens perform beautifully without a single technical glitch.
Maximize Your Return on Investment
Ultimately, exhibiting at a premier tech event is a major investment for your company. To get the best possible return, you must drive consistent traffic to your floor space. Because our high-brightness displays are so engaging, they naturally increase the dwell time of visitors. When people linger longer to watch your digital content, your sales team gets more valuable opportunities to start meaningful conversations. Of course, if your booth looks the same as it did five years ago, so will your results. In fact, at CES if you’re renting floor space but not renting a video wall, you’re funding your competitor’s leads. Let’s Build Something Amazing Together
You don’t have to settle for a standard, uninspiring trade show display. Let our team elevate your presence with our top-tier CES booth design services and state-of-the-art rental hardware. Contact us today to discuss your vision, and together, we will create a custom environment that leaves a lasting impression on every single attendee.
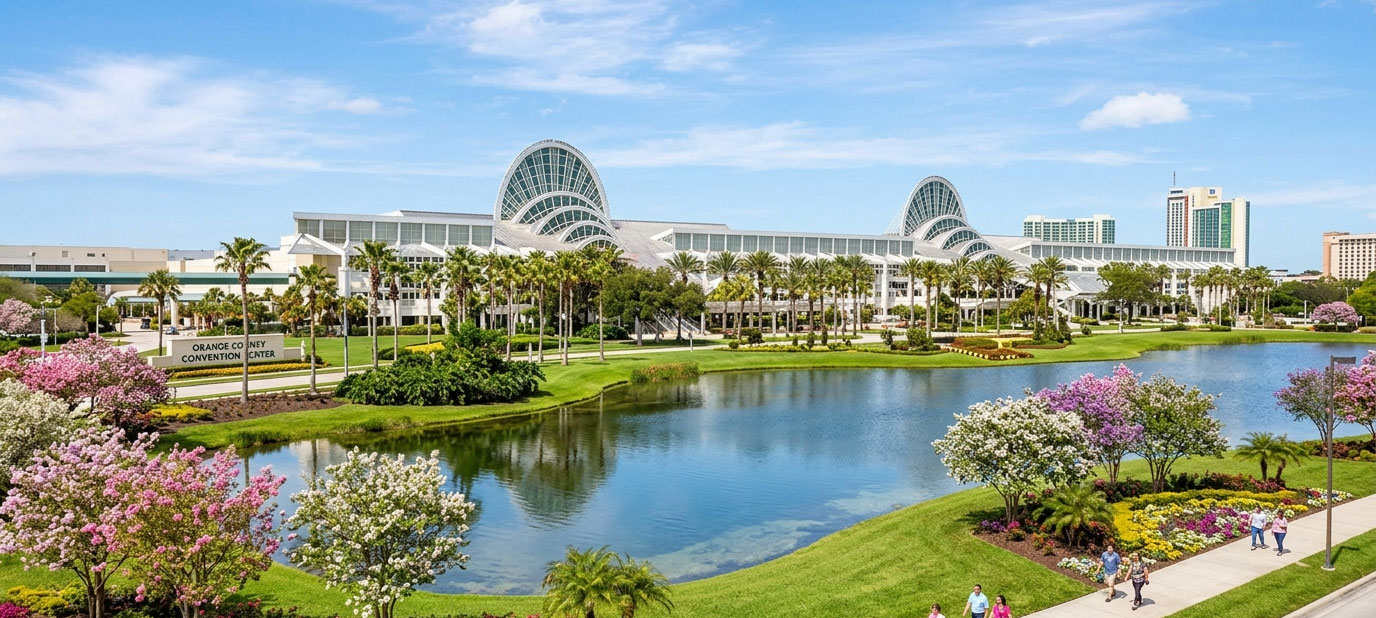
Are you preparing for an upcoming trade show, convention, or corporate event in Central Florida? If so, you already know that capturing the attention of busy attendees is your biggest challenge. In a sea of traditional banners and basic fabric backdrops, your brand needs something extraordinary to stand out. We can help with an County Convention Center Video Wall Booth Rental that will attract attention! At LED Exhibit Booths, we specialize in turning ordinary event spaces into immersive, high-impact brand experiences.
By leveraging cutting-edge technology, we help companies maximize their event ROI. Whether you want to showcase product demonstrations, stream crystal-clear promotional videos, or create an unforgettable interactive environment, we have the perfect visual solutions for you.
Elevate Your Trade Show Presence with Orlando LED Displays
Orange County Convention Center Video Wall Booth Rental
When you exhibit at one of the largest venues in the United States, you cannot afford to blend into the background. That is why we offer the premier Orange County Convention Center Video Wall Booth Rental service. Because the OCCC hosts massive crowds, a standard pop-up display simply will not cut it. You need a solution that draws eyes from across the entire exhibition hall.
Our premium seamless LED video walls are custom-built to fit your specific booth dimensions. Furthermore, these dynamic displays offer vibrant colors, incredible brightness, and flawless resolution that looks stunning even under harsh convention center lighting.
When you choose our Orange County Convention Center Video Wall Booth Rental, you are not just renting equipment; instead, you are investing in a full-service experience. Our expert team handles everything from the initial design and structural engineering to on-site delivery, precise installation, and technical support throughout the duration of your event. Consequently, you can focus entirely on engaging with your prospects while we ensure your visuals run flawlessly.
The Ultimate Orange County Convention Center Video Wall Booth Rental
Premier Orlando LED Displays for Every Event
In addition to our large-scale convention center rentals, we can also help with your conference audiovisual needs. Plus, we are proud to be the top provider of versatile Orlando LED Displays. Naturally, when you contact us about an County Convention Center Video Wall Booth Rental you’ll get expert advice and 3-D renderings at no charge. We understand that every brand has unique goals and budget constraints. Therefore, we offer a diverse inventory of LED technology to suit any occasion, including:
High-Resolution Indoor LED Panels: Perfect for close-up viewing, detailed product presentations, and sleek corporate keynotes.
Flexible & Curved LED Walls: Ideal for creating unique, architectural booth designs that wrap around corners or create immersive tunnels.
Interactive LED Touchscreens: Excellent for engaging attendees with hands-on software demos, games, or digital catalogs.
Bright Outdoor LED Screens: Specially designed to withstand Florida’s bright sunlight for outdoor festivals, concerts, and experiential marketing activations. Outdoor video walls need to be brighter and waterproof.
Because we source only the highest-quality, ultra-fine pixel pitch panels, your digital content will always look razor-sharp. Whether you are hosting an intimate corporate seminar or building a massive multi-story exhibit, our Orlando LED Displays provide the reliability and visual brilliance your brand deserves.
Why Partner With LED Exhibit Booths?
Choosing the right technology partner can make or break your event success. At LED Exhibit Booths, we pride ourselves on delivering a seamless, stress-free experience from start to finish. Plus, our full service ad agency can help with video wall video production and trade show giveaways. Here is more of what sets us apart from the competition:
1. Tailored, Creative Solutions
First and foremost, we do not believe in a one-size-fits-all approach. We closely collaborate with your marketing team or exhibit designer to build a custom setup that perfectly aligns with your brand identity and event goals.
2. Local Orlando Expertise
Because we have extensive experience working directly inside the Orange County Convention Center and local Orlando resorts, we understand the specific logistical rules, union regulations, and rigging requirements of these venues. As a result, we avoid costly delays and ensure a smooth, efficient setup every single time.
3. All-Inclusive Turnkey Support
We know how stressful trade shows can be. For this reason, our comprehensive service includes delivery, meticulous assembly, content calibration, on-site tech monitoring, and rapid teardown. Plus, when you hire us for an County Convention Center Video Wall Booth Rental we keep an audiovisual technician at the show the entire time it’s open. Of course, usually nothing goes wrong, but if it does our technician is on call just for you! Ultimately, we manage the technical heavy lifting so you can focus on closing deals.
Ready to Transform Your Booth? Contact Us Today!
Do not let your brand get left in the dark at your next Florida expo. Let us help you dominate the trade show floor with a breathtaking visual presentation.
Contact our team today to discuss your upcoming project, request a free quote, and discover how our Orlando LED Displays and specialized Orange County Convention Center Video Wall Booth Rental solutions can take your exhibit to the next level. Together, we will create an unforgettable experience that your audience will talk about long after the event ends.
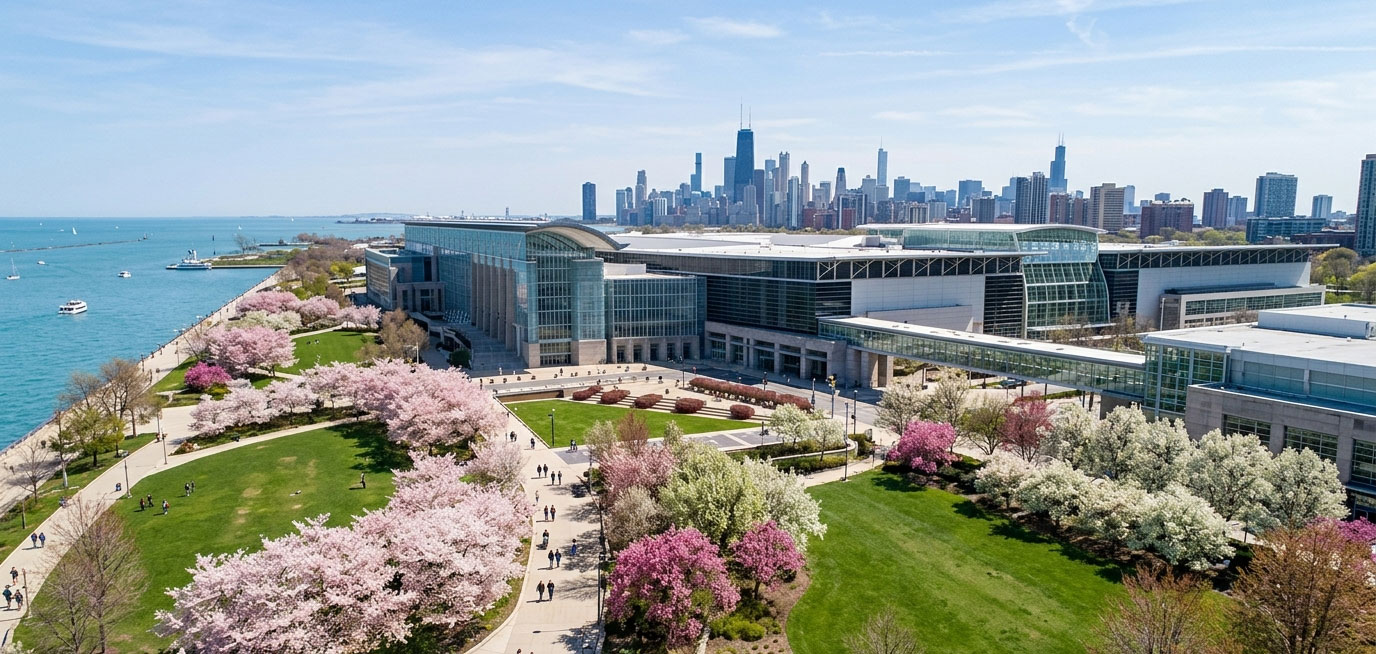
Are you preparing for an upcoming trade show in the Windy City? If so, you already know that standing out on a crowded exhibition floor is a massive challenge. Fortunately, we have the perfect solution to ensure your brand shines brighter than the competition. We specialize in providing premier McCormick Place Chicago LED Booth Rentals that captivate audiences, boost booth traffic, and leave a lasting impression.
Elevate Your Next Event with McCormick Place Chicago LED Booth Rentals
McCormick Place is the largest convention center in North America. Because it hosts hundreds of thousands of visitors every year, your business cannot afford to blend into the background. When you partner with us, we help you transform a standard exhibit space into an immersive digital experience. Our team delivers cutting-edge technology directly to your exhibition space, so you can focus entirely on connecting with potential clients.
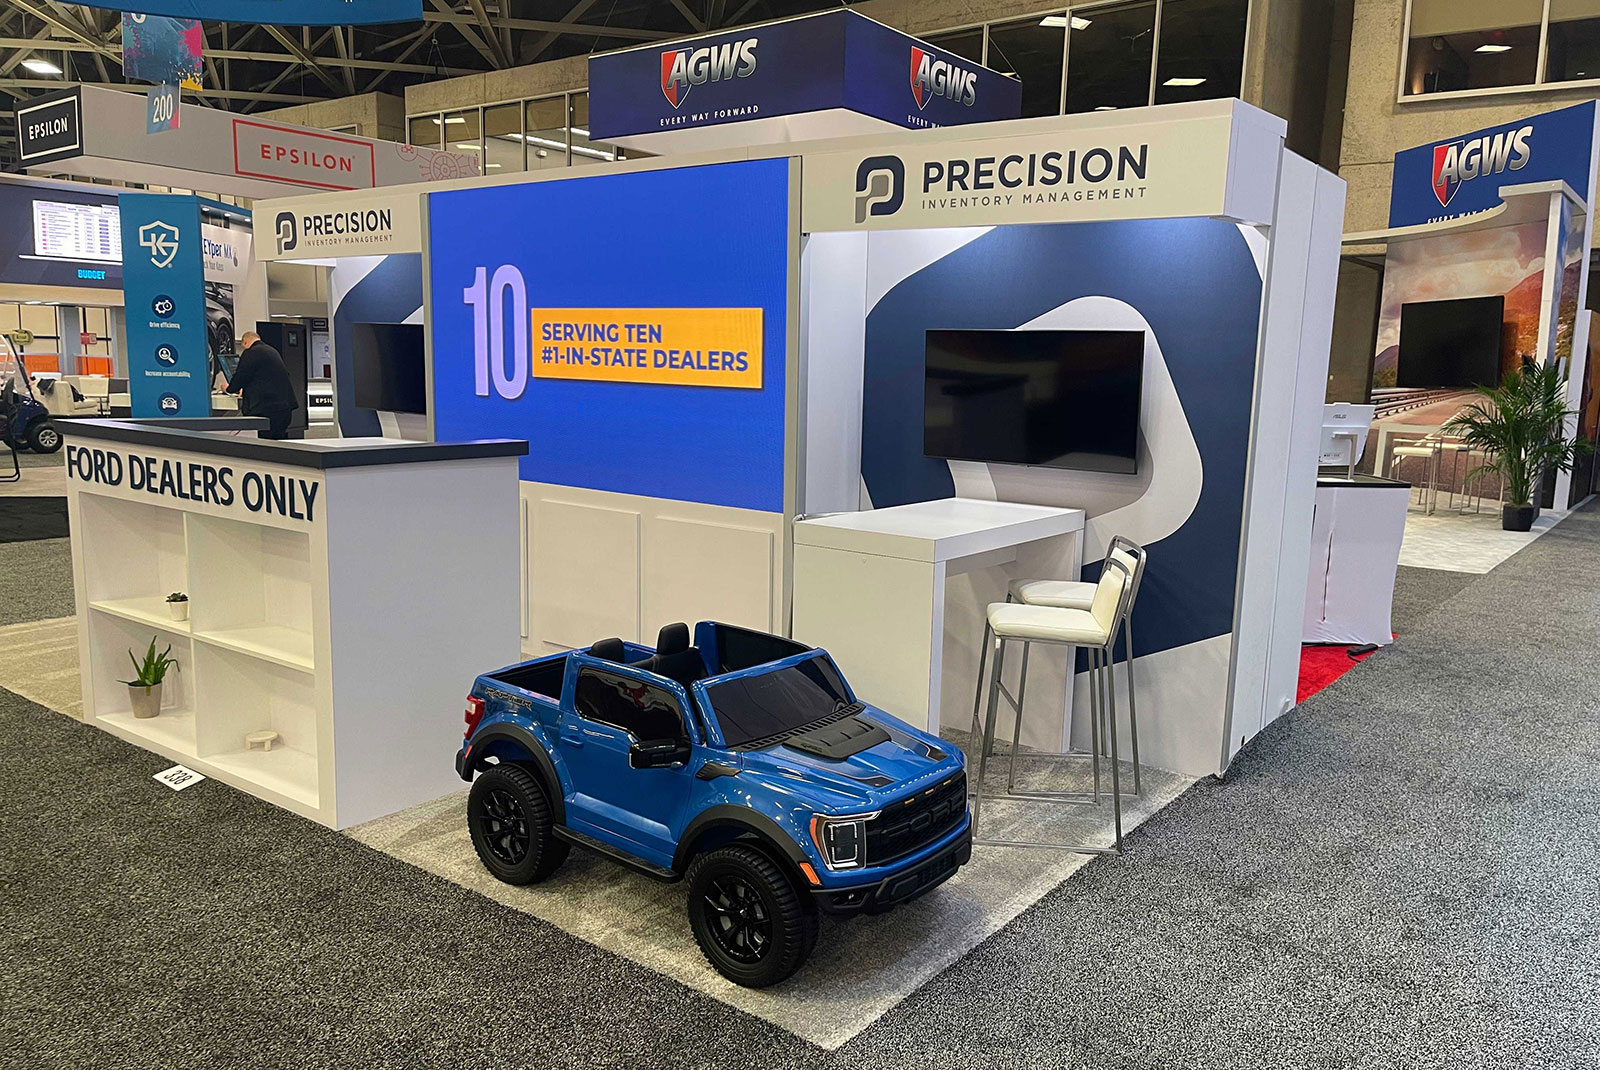
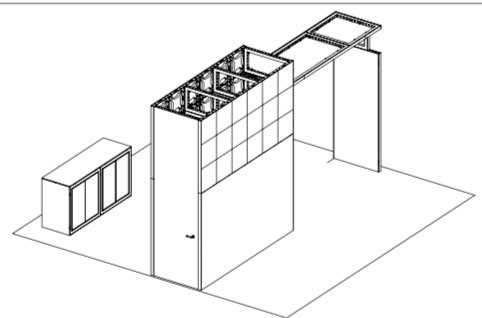
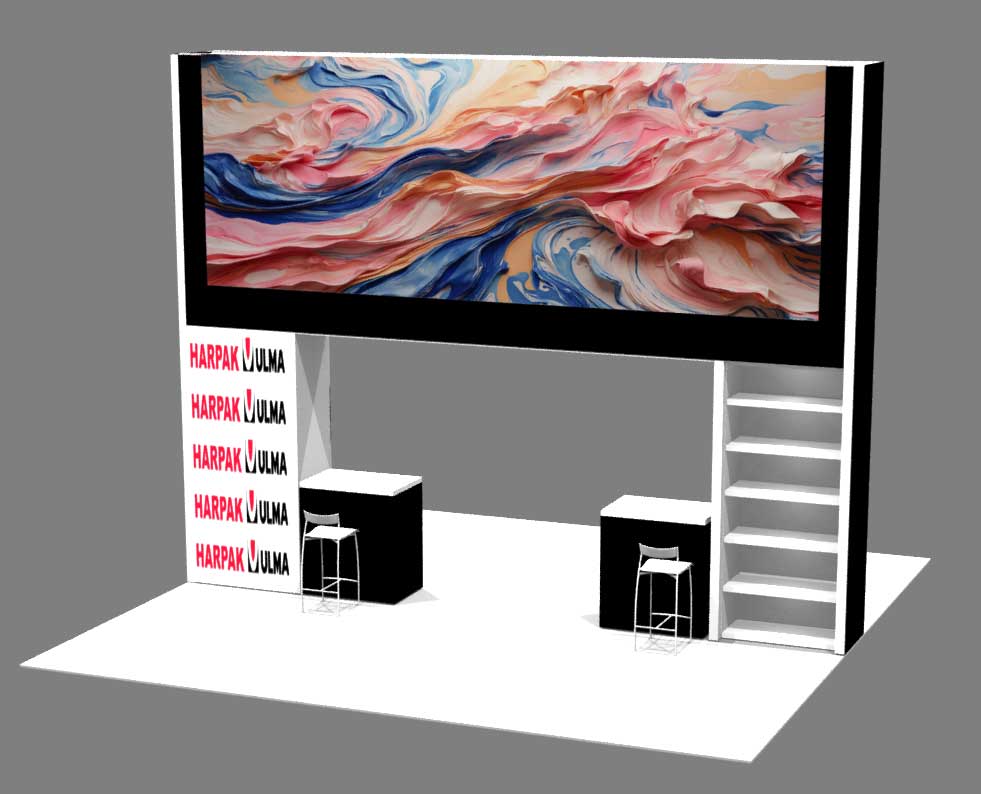
The rendering here shows a booth with the left half being a video wall with storage. The yellow graphic covers the door to the storage area. Also, the right side had a backlit graphic. This was for the AHR Expo.
Why Choose Our McCormick Place Chicago LED Booth Rentals?
First impressions matter immensely in the fast-paced world of trade shows. Consequently, traditional printed banners are no longer enough to attract busy attendees. By contrast, a vibrant, high-definition digital display instantly draws the eye from across the convention floor.
Here is why our clients consistently trust us for their exhibition needs:
Customized Design Solutions: We understand that every brand has unique goals. Therefore, we design bespoke LED configurations tailored specifically to your booth layout and marketing objectives.
Flawless Full-Service Execution: We handle everything from initial concept planning and on-site delivery to professional installation and technical support during the event. As a result, you will experience zero stress on opening day.
Unmatched Visual Brilliance: Our rental screens feature ultra-fine pixel pitches and incredible brightness levels. Consequently, your videos, graphics, and presentations will look razor-sharp, even under the harsh overhead lights of McCormick Place.
Captivate Crowds with a Chicago Trade Show Video Wall
In addition to modular booths, we proudly offer the ultimate tool for visual storytelling: the Chicago trade show video wall. If you truly want to dominate the exhibition hall, a seamless video wall is the ultimate way to do it.
Imagine displaying high-definition product demonstrations, live social media feeds, or cinematic brand videos on a massive, seamless digital canvas. Because our video walls are completely modular, we can build them to almost any size or shape. Whether you need a towering backdrop, a curved display, or a creative geometric layout, we can bring your vision to life.
Furthermore, dynamic video content naturally retains human attention much longer than static images. By integrating a Chicago trade show video wall into your display, you create an inviting atmosphere that naturally encourages attendees to stop, watch, and engage with your sales team.
Seamless Integration and Reliable Local Support
Navigating the logistics of a massive venue like McCormick Place can be incredibly daunting. Luckily, we are intimately familiar with the local venue regulations, union labor rules, and technical requirements in Chicago. Plus, we can help with custom trade show booth ideas at no extra charge. We’ll create a 3-D drawing for you.
First, we work closely with your team before the event to test your media content, ensuring perfect playback compatibility. Next, our local technicians manage the entire setup process efficiently, adhering strictly to venue timelines. Finally, we remain available to provide real-time technical support throughout the duration of your trade show. Plus, we can help with smaller 10×10 video walls or 20×20 video wall booths and some very big screen booths.
Because we manage all the heavy lifting, you can spend your valuable time networking, generating high-quality leads, and maximizing your return on investment.
Partner with the Chicago LED Display Experts Today
Ultimately, your success at a trade show depends heavily on your visibility. Do not let your brand get lost in the sea of exhibitors. Instead, let us help you create an unforgettable visual experience that drives foot traffic and generates buzz. Additionally, we have years of experience with custom exhibit booths.
Whether you want to explore our complete McCormick Place Chicago LED Booth Rentals or want to design a breathtaking Chicago trade show video wall, our team is ready to assist you.
Contact us today to receive a free, no-obligation quote for your next Chicago event. Let us work together to make your next exhibition your most successful one yet!
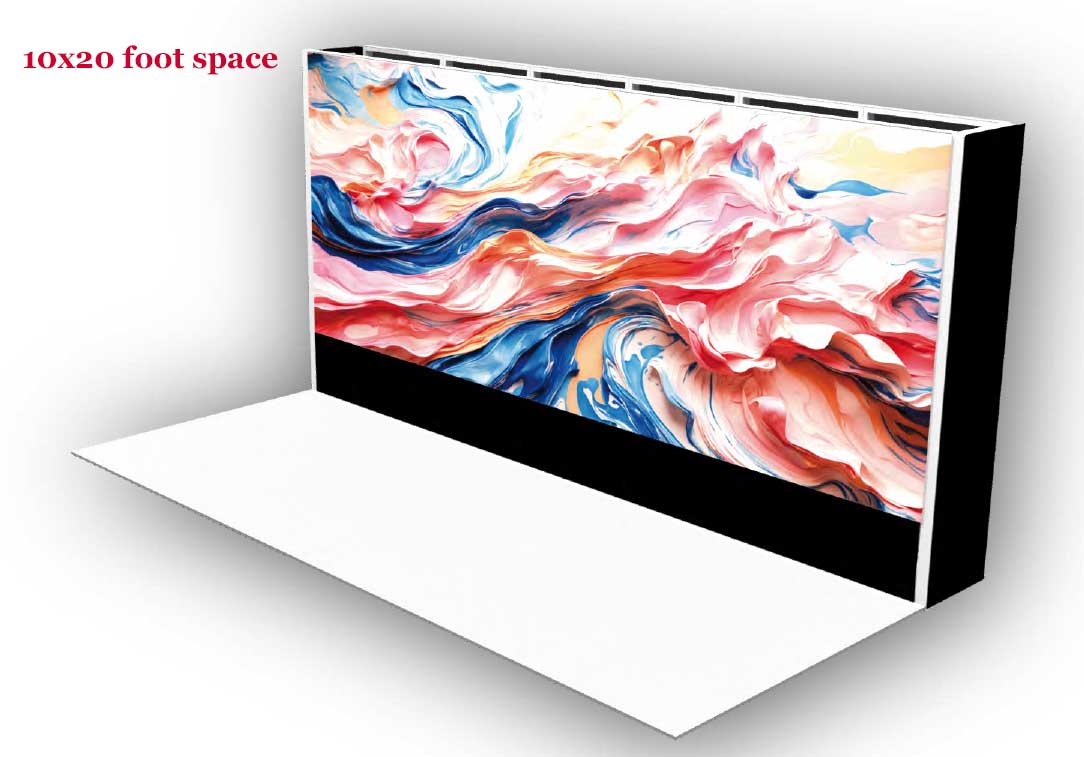
Maximize Your Trade Show ROI with a 20×20 LED Video Wall Booth
Are you preparing for an upcoming trade show? If so, standing out on a crowded expo floor is your top priority. A standard fabric display will no longer cut it. Instead, you need a modern solution that grabs attention immediately. A custom 20×20 LED Video Wall Booth offers the perfect balance of space, visibility, and high-tech style to make your brand unforgettable.
First of all, a twenty-by-twenty footprint provides an excellent canvas for custom structural layouts. Because this size functions as an island or a prominent corner space, attendees can view your brand from multiple angles. Therefore, adding a seamless, high-resolution LED video wall turns your booth into a visual anchor for the entire convention center hall.
Why Choose a 20x20 LED Video Wall Booth?
Traditional printed graphics are static, expensive to re-print, and easily lost in the sea of competing exhibits. Incorporating digital display technology gives your marketing team total creative control. Plus, we can help with trade show booth ideas.
Unmatched Brightness & Contrast: High-density LED panels cut through harsh convention center lighting, ensuring your video content, animations, and branding remain crisp, vibrant, and visible from hundreds of feet away.
Dynamic Content Flexibility: Run looping product demos, stream live presentations, display real-time social media feeds, or switch your entire booth messaging instantly between morning and afternoon sessions.
Modular Versatility: The beauty of pixel-perfect LED panels lies in their adaptability. We can configure them into seamless flat walls, wrapping corner displays, immersive archways, or massive suspended digital banners.
Seamless Aesthetics: Unlike older multi-screen TV setups that feature distracting plastic bezels cutting through your graphics, our modular LED technology tiles together flawlessly to create a single, continuous digital canvas.
Popular Layout Options for Your 20x20 Space
When you design your exhibit, layout flexibility is vital. Fortunately, our modular tile systems allow you to construct several unique setups. Here are three popular configurations that clients choose to drive massive booth traffic:
1. The Cinematic Backdrop Layout
First, you can place a continuous, massive video display along the main back wall. Consequently, this creates an immersive backdrop for your entire space. This specific setup works best if you plan to host live product demonstrations or give theater-style presentations. As a result, visitors can easily view your digital content from far down the aisles. Naturally, our goal is to help you attract attention from all directions with your 20×20 LED video wall booth rental.
2. The L-Shaped Corner Wrap Layout
Alternatively, you might choose an L-shaped structure. By wrapping the LED screens around two adjacent sides, you build an inviting interior space. This design draws attendees directly into your environment. Meanwhile, the outer screens continue to display vibrant promotional graphics to passing crowds.
3. The Split-Screen Pillars Layout
Finally, some exhibitors prefer a modern architectural look. In this case, we divide the display into multiple vertical pillars or columns. These bright, synchronized screens flank an open central area. Therefore, you gain multiple distinct display surfaces while keeping your island footprint open, spacious, and highly accessible.
Pro Tip for Trade Show Marketers: Always align your digital animation with eye level. Because the bottom section of a display can be blocked by furniture or visitors, place your critical brand messaging and logos on the upper half of your 20×20 LED Video Wall Booth.
Turnkey 20x20 LED Video Wall Booth Rental Packages
We know that planning a trade show can be stressful. For this reason, we design our all-inclusive rental packages to handle every single technical detail. This approach allows your team to focus strictly on sales and lead generation.
Package Tier
Ideal For
Included Visual Elements
Essential Video Package
Clean, high-impact branding
10ft x 7ft Seamless LED Wall, Modular Structure, Basic Lighting
Elite Presentation Tier
Live demos and presentations
16ft x 9ft HD Video Wall, integrated AV Sound, Custom Counters
Ultra Immersive Island
Premium experiential booths
L-Shape or Dual-Wall Config, 1.9mm Pixel Pitch, Full LED Accent Lighting
Every package comes with our comprehensive technical support. Specifically, our team handles delivery, installation, and finally dismantle. We also provide a dedicated on-site audiovisual technician during show hours. Consequently, you will never have to worry about complex wiring or hardware glitches with our 20×20 LED video wall booth rental. Plus, if anything does go wrong our AV technician is on call just for you. Additionally, we can help with smaller booth spaces as well. You may want to look at our 10×10 video wall rentals.
Which is Better Rental or Purchase
Some companies think about purchasing their trade show hardware. However, renting a digital display offers significant financial advantages. First, you save thousands of dollars on annual storage fees. Second, you completely eliminate shipping, drayage, and regular maintenance expenses. Most importantly, technology updates quickly. When you rent from us, you always get access to the sharpest, newest LED screens on the market.
The number of trade shows you attend each year is an important consideration. For instance, 1-4 shows per year, you should probably rent your video wall booth. If you do 6 or more trade shows per year, it’s worth thinking about a purchase. Of course, if you do 10 or more shows per year, you would save money with a purchase.
Reserve Your Custom Render Today
Are you ready to dominate your next trade show? We are here to help you build the perfect display. Contact our expert design team today. We will listen to your specific creative goals. Plus, we can help with video production for your video wall. Afterward, we will provide a complimentary 3D render of your custom 20×20 LED Video Wall Booth. Let us help you elevate your event presence and generate more revenue today.
A display video wall usually enters the conversation after a frustrating booth review. The graphics looked fine in the office. The rented TVs seemed “good enough” on paper. Then the show opened, and the booth disappeared into the visual noise. Content was chopped up by bezels, setup took too long, and your team spent opening morning troubleshooting instead of talking to buyers.
That’s why more exhibitors are moving to purpose-built LED systems. The display video wall market reached USD 18.33 billion globally in 2024 and is projected to grow at a 14.0% CAGR from 2025 to 2030, driven by demand for immersive engagement in high-traffic environments such as retail, entertainment, and trade shows, according to Grand View Research’s interactive video wall analysis. This isn’t a novelty category anymore. It’s becoming standard equipment for brands that need to be seen.
The practical question isn’t whether video can help. It’s whether your booth system is built to make video easy, reliable, and cost-effective on a show floor. That’s where the difference between modern LED tiles and outdated monitor stacks gets very real.
Your Guide to a Next-Generation Display Video Wall
Most exhibitors don’t need another screen. They need a booth that works harder.
A modern display video wall turns the structure itself into the message. Instead of hanging a few monitors on a frame and hoping people stop, you create one digital surface that carries motion, branding, demos, and atmosphere across the entire booth. That matters because trade shows are chaotic. Buyers scan quickly. If your booth doesn’t register in a glance, you lose the moment.
The shift toward immersive display technology is happening for a reason. Buyers now expect motion, clarity, and polish. They’ve seen sleek retail installs, branded event environments, and high-end launch spaces. Those expectations follow them onto the show floor. If your exhibit still relies on pop-up graphics and a lone TV, it feels dated even before the first conversation starts.
Here’s the part many vendors miss. Specs alone don’t solve trade show problems. Operational ease does. You need a wall that looks sharp from close range, goes up cleanly, ships efficiently, and doesn’t leave your team babysitting hardware all day.
Practical rule: If your display system creates more labor, more freight complexity, or more chances for failure, it’s not helping your exhibit program.
For content inspiration, teams planning motion assets often discover AI video solutions for creators when they need fresh ways to produce short-form booth visuals without dragging every update through a long studio process. And if you want to see how this technology changes actual booth layouts, review these video wall booth examples.
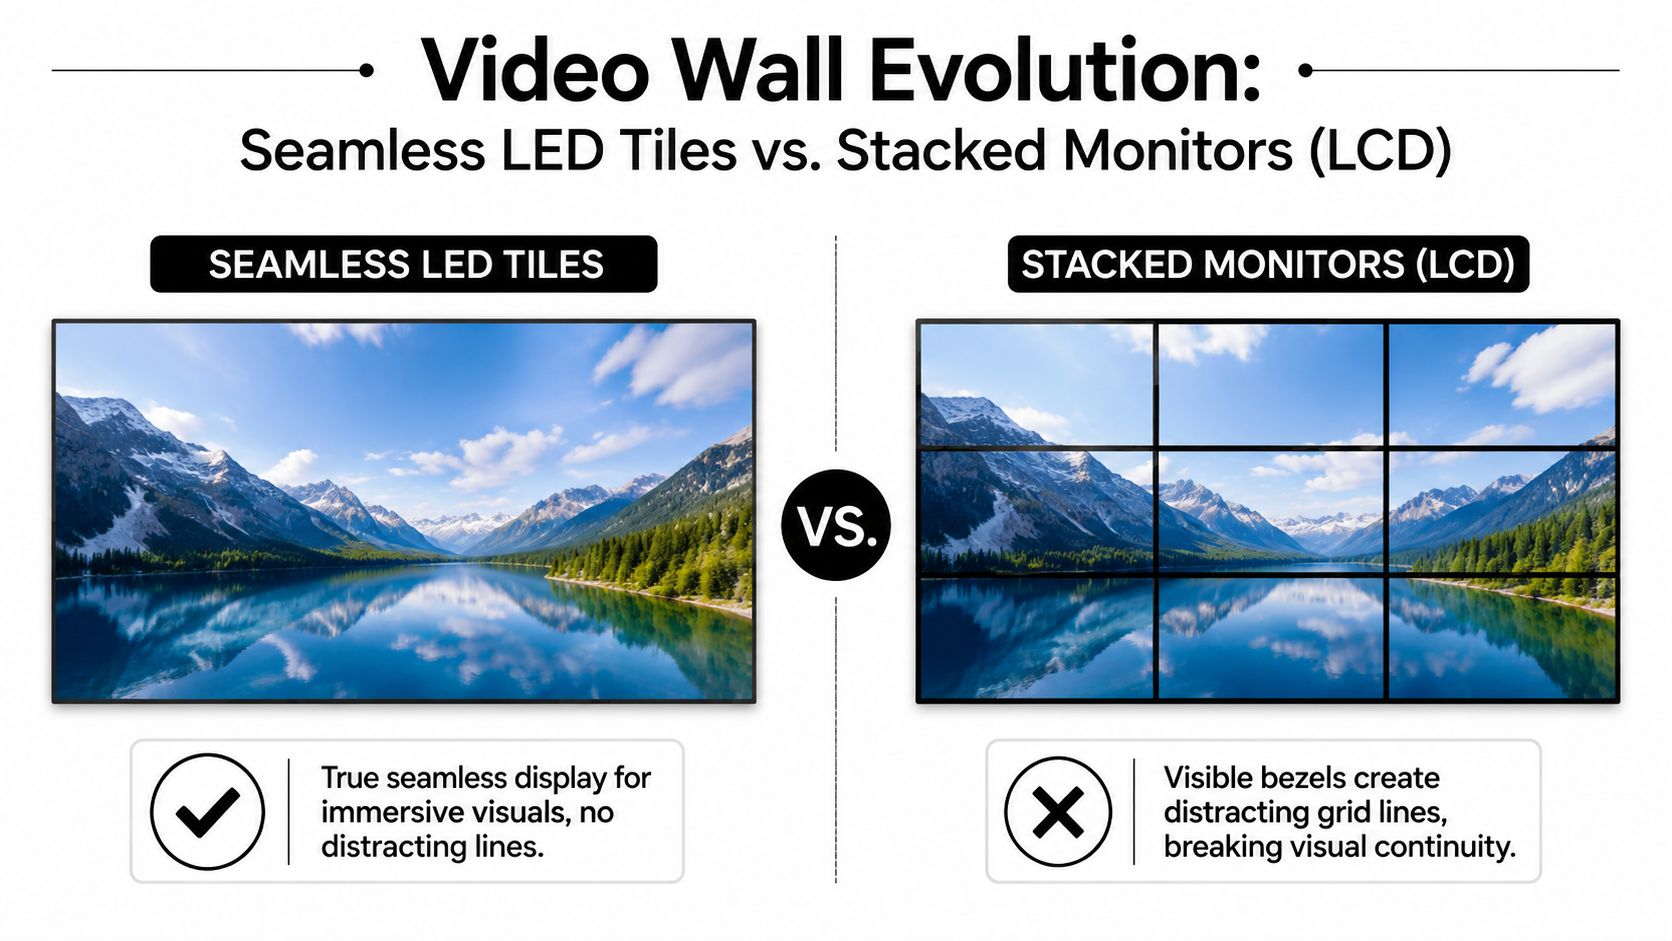
Seamless LED Tiles Versus Stacked Monitors
When many exhibitors say “video wall,” they still mean a cluster of televisions mounted together. That setup is familiar. It’s also the wrong approach for most trade show environments.
What stacked monitors get wrong
LCD monitor arrays have a basic problem. Every panel has a border. Put enough of them together and your video becomes a grid. Logos split. Faces break across lines. Product footage loses impact because the screen itself interrupts the story.
They also create a second set of problems behind the scenes:
More structure: Monitor walls often need heavier support frameworks and more mounting hardware.
More cable management: More screens usually means more signal paths, more power runs, and more failure points.
Less design freedom: Flat rectangles are easy. Arches, columns, and integrated counters are not.
That old format can still work for certain budget installs or fixed environments. It’s just not what we recommend when the goal is a polished trade show presence.
Why seamless LED changes the booth
An LED tile system with nearly invisible joints gives you one continuous visual surface. No black lines cutting through your content. No patchwork feel. The booth looks intentional because the display and the structure are the same thing.
That has a direct effect on how people read your brand. A unified wall makes motion graphics look premium. Product videos feel larger. Simple content, even a clean loop with logo, color, and movement, has more authority when it isn’t fractured across screens.
Here’s the side-by-side difference that matters most:
More pieces, more hardware, more visual compromise
Seamless LED tiles
One uninterrupted canvas with clean motion and brand continuity
Cleaner build logic, more flexible shapes, a stronger finish
If your content crosses panel seams and still looks whole, the booth feels expensive. If the content breaks into boxes, the booth feels improvised.
The real trade show test
The show floor doesn’t reward “close enough.” It rewards clarity and visual confidence. A display system should look good from across the aisle, from an angle, and at close range when someone walks up to ask a serious question. Unified LED does that better because it was built for scale, not borrowed from living room hardware.
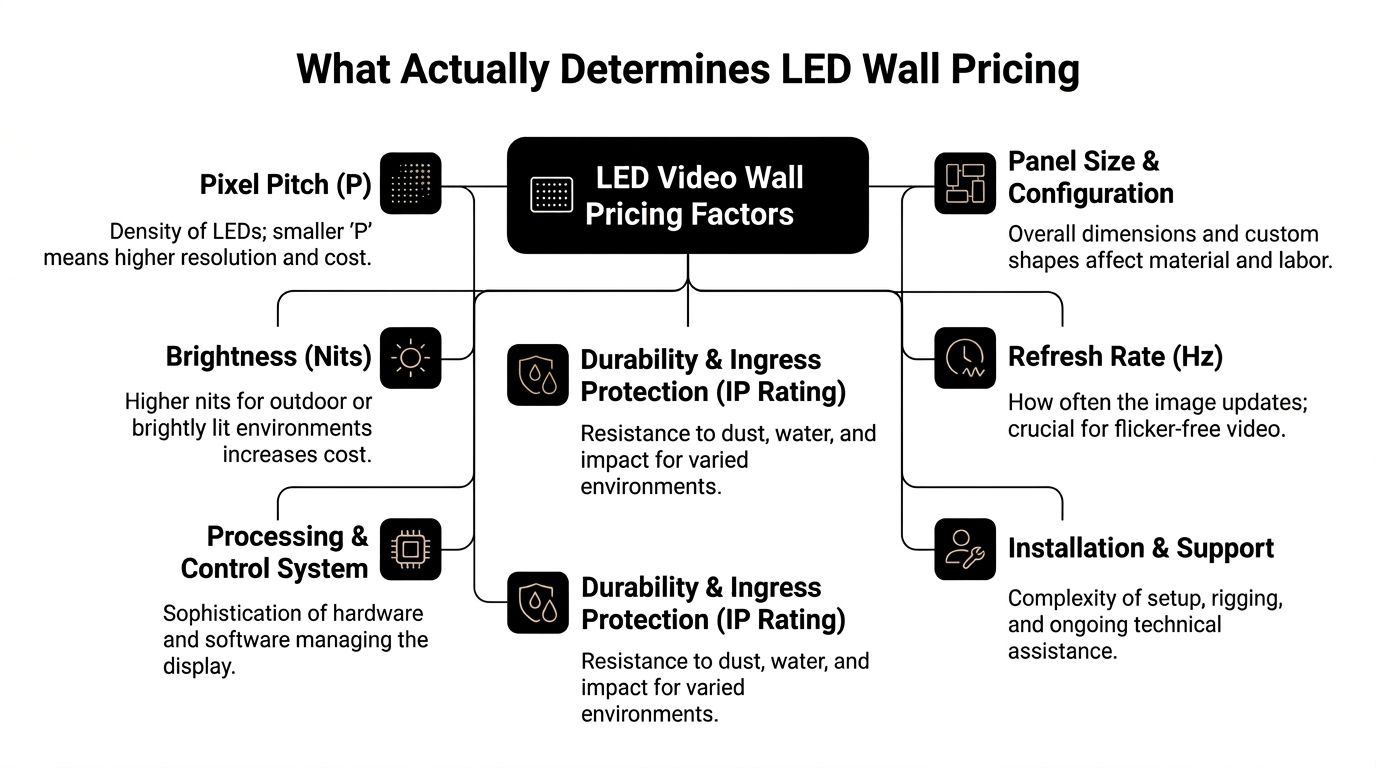
Key Specs That Matter on the Show Floor
Specs matter when they change what attendees see and what you pay. Most spec sheets bury that point. We don’t.
Pixel pitch decides whether your wall looks premium
Pixel pitch is the distance between LED pixels. Smaller pitch means tighter spacing and a sharper image at closer viewing distances. That matters at trade shows because people rarely stand far away for long. They pass by, stop, step in, and often end up only a few feet from the wall.
According to American LED Wall’s direct-view video wall overview, a P1.5 display supports clear viewing from about 1.5 to 2 meters without visible pixelation, and fine-pitch direct-view LEDs of 1.99mm or below now dominate premium installations. That lines up with real booth behavior. People often view displays from close range.
We standardize on P1.9 while many competitors still push P2.5. The result is simple. Our walls deliver higher resolution and a cleaner image up close. Text holds together better. Product renders look more refined. Faces and motion graphics don’t break apart as easily when someone walks right up to the booth.
If you want to compare configurations, panel formats, and applications, review these LED wall panels.
Brightness is not optional in a convention hall
Trade show halls are bright, reflective spaces. Overhead lighting flattens weak displays fast. A wall that looked fine in a dark showroom can look washed out on site.
For indoor expo use, brightness needs to be selected for the environment, not for a brochure. We recommend treating brightness as a visibility tool, not a vanity number. If the image doesn’t hold color and contrast under event lighting, attendees won’t stop.
Weight affects budget more than most exhibitors realize
The third spec is the one too many buyers ignore until the invoice lands. Weight affects freight, handling, labor, and setup flexibility. Heavier systems usually create more operational friction.
A lighter tile-based system is easier to move, stage, and assemble. That reduces the chance of install mistakes and helps the crew work faster. It also supports booth designs that would be more painful with bulkier hardware.
Here’s the short version:
Choose fine pitch for close viewing: Trade show traffic gets close, so image density matters.
Choose enough brightness for venue lighting: You’re competing with glare, aisle traffic, and neighboring booths.
Choose lighter hardware when possible: Lower weight supports easier logistics and a less expensive show program.
Decoding Trade Show Setup and Logistics
You are on the show floor at 7:30 a.m. Forklifts are still moving, labor windows are closing, and one missing bracket can stall the whole booth. That is why setup is not a side issue. It is part of the display system you are buying.
The real budget problem is usually behind the booth
Renderings do not show drayage, crate count, union labor hours, storage, or the cost of a delayed install crew standing around. Those are the expenses that push a trade show program off budget. Older display methods create more of that friction because they usually require more pieces, more packing, more mounting hardware, and more points of failure.
According to Smart LED’s video wall display guidance, efficient LED systems can reduce power demand and help control electricity costs billed by the venue. That matters, but the bigger savings often come from operations. Lighter, modular LED systems are easier to ship, easier to stage, and easier to install correctly on the first try. We recommend judging a display video wall by total cost of ownership, not just the screen price.
The venue will still charge for show services such as material handling and electrical service. You cannot remove those line items. You can send less hardware, reduce labor complexity, and avoid the chain reaction that starts when one late component holds up the entire booth.
Easier installs mean fewer expensive mistakes
A well-designed LED wall reduces stress because the install process is simpler. Fewer brackets. Fewer alignment issues. Fewer fragile monitor connections. Your crew spends less time fixing the structure and more time checking content, signal flow, and final presentation before attendees arrive.
That matters even more at large venues and international events, where schedules are tighter and support teams are spread thin. If you are planning an overseas exhibition, practical prep such as how to navigate the Canton Fair helps your team avoid wasted time once you arrive.
If you want to compare labor requirements, mounting methods, and support scope, review these LED video wall installation details before you commit.
A lower-stress installation plan usually includes:
Preconfigured components: Tiles, processors, and support parts are packed for the exact booth layout.
Fast assembly: Crews secure panels quickly instead of wrestling with stacked monitor mounts and extra framing.
On-site testing: Content, signal routing, and alignment are verified before the hall opens.
Later in the process, the operational side becomes easier to visualize:
The exhibitor who spends less time solving setup problems gets more time selling.
Renting Versus Purchasing Your Display Video Wall
Buying sounds efficient until you account for everything that comes with ownership. Storage. transport. maintenance. repair coordination. technology aging. show-to-show variability. Those costs don’t disappear because the hardware sits on your balance sheet.
For many exhibitors, renting is the cleaner decision.
When ownership makes sense
If you exhibit constantly, use a repeatable footprint, and have the internal staff or agency support to manage logistics, ownership can work. It gives you asset control and consistency. It can also make sense when your team wants a fixed system for repeated launches or roadshow use.
But buying only pays off when your organization is equipped to operate like an equipment manager. Many aren’t, and they shouldn’t have to be.
Why renting fits most trade show programs better
According to AVNetwork’s look at advanced LED video wall rental trends, an emerging shift since mid-2025 points toward rentable systems, and 2026 data shows 70% of mid-sized firms prefer rentals to avoid a $50K+ capital expenditure, while turnkey rentals can cut total exhibiting costs by 30% to 40% through integrated logistics and scalability. That’s a strong signal. Companies are deciding that flexibility and operational simplicity matter more than owning hardware.
Renting also keeps you closer to current technology. You’re not locked into an aging display while competitors show up with finer pitch, lighter panels, and cleaner integration. You can match the booth to the event instead of forcing every event into the same physical kit.
A few major shows, varying booth sizes, limited internal technical staff
Renting
Frequent repeat use, standardized footprint, dedicated operations support
Purchasing
Need predictable execution without maintenance headaches
Renting
Comfortable managing storage, service, and lifecycle planning
Purchasing
The mistake is buying because it feels more permanent. Permanence isn’t the goal. Useful, reliable execution is.
Beyond Technology How to Tell a Compelling Story
A great display video wall with weak content is still a weak booth. The wall gets attention for a moment. The story is what keeps people there.
The booth should feel like a branded environment
Too many exhibitors load one corporate video, hit loop, and call it done. That wastes the medium. A continuous digital surface lets you create rhythm. You can run ambient motion when traffic is flowing, shift to product footage during demos, and simplify the screen when a salesperson needs focus for conversation.
That’s why structure matters. One large visual can stop people in the aisle. Then the content should help them understand what you sell in seconds, not minutes.
A useful creative mix often includes:
Motion-led attract loops: Fast, bold visuals that pull eyes from a distance.
Product proof segments: Clear demonstrations, features, or application shots.
Support zones: Secondary areas for logos, messaging, or directional prompts.
Most exhibitors default to flat walls because they’re familiar. That’s fine if the content is strong and the booth is tight. But there are times when the physical shape of the display does part of the storytelling for you.
According to Azar Pixel’s discussion of video wall viewing angles, creative configurations such as curved arches can boost attendee engagement by up to 25% because they pull content into peripheral vision and create a more immersive experience. That’s a useful reminder that storytelling is not just about the media file. It’s also about how people encounter the display in space.
Curved formats work when the content is designed for them. Don’t bend the wall and then run flat, lifeless slides.
For exhibitors developing motion content specifically for trade show surfaces, these video wall video production considerations can help avoid the usual mistakes.
Our Turnkey Solution The End of Exhibitor Headaches
Trade show failure rarely starts with the screen. It starts at 7:00 a.m. on install day, when freight is delayed, labor is waiting, the content is not mapped correctly, and your team is stuck calling three different vendors while show costs keep rising.
We built our service around preventing that mess.
A display video wall should do more than look impressive. It should reduce the number of people you need to manage, cut avoidable labor mistakes, and keep your staff focused on selling instead of troubleshooting. That is what lowers total cost of ownership in practice.
What we include and what the show bills directly
Our pricing is straightforward. We include the parts that usually create stress and cost overruns. The show bills you directly for venue-controlled charges such as electricity and material handling.
Everything else sits under one scope with us, so your team is not chasing separate freight contacts, labor crews, install supervisors, and AV support.
Your quote typically includes:
Shipping and transport coordination: We manage delivery timing and movement so the booth arrives where it needs to be.
Setup and dismantle: Installation and teardown are handled as part of the service.
White-glove execution: We manage the details on site so your team can stay focused on meetings and lead generation.
That structure matters. Fragmented vendors create expensive gaps. One missed handoff can trigger overtime labor, delayed opening, or a booth that looks unfinished when attendees first walk in.
The support model matters as much as the wall
Hardware is only half the job. Show-floor support is what protects your investment.
We keep an audiovisual technician on site for all show hours. If playback fails, a processor needs adjustment, or a signal issue appears, your team does not waste time hunting for help. You call or text, and the technician comes to the booth and fixes it.
That saves more than frustration. It protects traffic, prevents lost conversations, and keeps your staff out of problem-solving mode during the busiest hours of the event.
Low upfront pricing often looks attractive until something goes wrong. Then the hidden costs show up fast. Extra labor time, delayed fixes, distracted booth staff, and missed attendee engagement are all part of the actual bill.
LED Exhibit Booths is one option to evaluate if you want integrated LED structures, logistics, setup, and on-site support under one scope.
The right display video wall attracts attention, cuts operational drag, and makes show day easier for your team. If it only looks good in a rendering, it is not doing enough.
led wall panels solve a problem most exhibitors know too well. You pay for the space, ship the booth, brief the team, and still end up looking flat next to brands that move, glow, and pull people in from the aisle.
Marketing managers don’t need another gadget. You need a booth that gets noticed, supports your story, and doesn’t create technical chaos during show hours. That’s why we recommend led wall panels when the goal is stronger presence and less stress. Done right, they turn your structure itself into the message instead of treating the screen like an accessory.
Why Your Booth Needs More Than a Banner to Stand Out
Most booths fail before anyone reads the headline. Attendees scan fast. If your space looks static, they keep walking. A printed backdrop can still support a booth, but it won’t compete with motion, scale, and light on a crowded floor.
Modern led wall panels changed that. The key turning point came in 1992, when the invention of true blue LEDs enabled full-color RGB displays, a breakthrough later tied to the 2014 Nobel Prize in Physics. That innovation is what transformed LED displays from single-color indicators into the large visual canvases now used across trade shows and events, as noted in this history of direct-view LED video walls.
Static graphics don’t stop traffic like LED wall panels
A banner tells. A video wall demonstrates. That difference matters when you’re launching a product, showing software, running a brand film, or trying to make a small footprint feel bigger.
We see the same pattern at shows. Brands that rely only on print often struggle to create depth. Brands that use motion graphics, product visuals, and timed messaging across led wall panels create a booth people notice before the sales team says a word.
If you’re still weighing whether the upgrade is worth it, look at the difference between a standard backdrop and a pop-up wall display approach that creates a focal point.
A trade show booth has one job first. Earn the next three seconds of attention.
Attention is only half the value
The primary benefit isn’t just visual impact. It’s control. You can change messaging by daypart, audience, or meeting schedule. You can run a teaser before a demo, product visuals during traffic peaks, and cleaner brand content during networking hours.
That’s why we push clients to think beyond “screen size.” The right led wall panels give you a live communication surface that works as hard as your team does.
Decoding the Specs of High-Impact LED Wall Panels
Most spec sheets are written for engineers. Marketing managers need a simpler filter. When we evaluate led wall panels for a trade show booth, we care about one question first. Will this look sharp from the actual distance your audience sees it?
That’s where pixel pitch matters most. Pixel pitch is the distance between LED pixel centers. For trade shows, it’s the main driver of both cost and visual quality, and a finer pitch like P1.9 gives higher pixel density for close-up viewing than the coarser P2.5 or P3.0 options commonly offered elsewhere, as discussed in Samsung’s overview of digital signage and video wall innovations.
Pixel pitch decides whether your booth looks premium
Think of pixel pitch like the difference between a crisp laptop display and an old scoreboard. The smaller the spacing, the smoother the image looks up close. That matters in trade shows because people don’t always stand far away. They stop at the aisle, step into the booth, and often view the wall from only a short distance.
Our standard recommendation is P1.9 for brands that care about a polished presentation. Many competitors lean on P2.5 because it’s cheaper. That’s the tradeoff. Lower upfront equipment cost, lower resolution. If you’re showing product detail, software interfaces, lifestyle footage, or brand video with text overlays, P1.9 is the better call.
The core specs that actually matter with LED wall panels
Below is the practical version of the spec sheet.
Specification
What It Means
Our Advantage (LED Exhibit Booths)
Competitor Standard
Pixel Pitch
Distance between LED pixels and the main factor behind clarity
P1.9 for sharper close-up viewing
Often P2.5
Brightness
Light output needed for venue conditions
Spec matched to booth environment
One-size-fits-all recommendations
Refresh Rate
How smoothly video displays, especially on camera
Chosen for live event content and filming needs
Often treated as an afterthought
Viewing Angle
How well content holds up from the side
Better planning around aisle traffic and booth geometry
Flat-wall assumptions
Panel Construction
How panels connect and assemble
Built for fast exhibit deployment
More cumbersome setups
Service Model
What happens if something fails during show hours
On-site support model
Remote help or limited floor support
If you’re comparing products, don’t get distracted by a long list of secondary features before you confirm the pitch and viewing distance match.
For a closer look at display options built for exhibit environments, review this page on LED panels for video walls.
Brightness has to fit the hall
Brightness is not a vanity metric. It’s about whether your content stays visible in the actual booth location. A dim panel can look fine in a dark showroom and washed out on a bright convention floor.
We also care about how the wall performs when the content is filmed. Brands doing interviews, demos, or social capture at the booth need panels configured to avoid visual issues on camera. That doesn’t mean chasing specs for the sake of it. It means choosing the right system for the content plan.
Practical rule: Start with viewing distance, then pick pixel pitch. Start with venue lighting, then pick brightness. Don’t do it in reverse.
Lightweight modular design affects real cost
Marketing teams often focus on the display and forget the labor. That’s a mistake. Panel construction changes setup time, install complexity, and the chances of something going wrong under deadline.
We prefer modular systems that go up cleanly and predictably. Better panel design means fewer install headaches, cleaner seams, and less booth-side improvisation. That has direct ROI because your team spends less time troubleshooting and more time meeting prospects.
Cheaper options usually hide the pain in deployment. The wall may technically work, but the finish looks rough, the process drags, and every adjustment becomes a production.
Creative Designs Using Modular LED Wall Panels
A flat rectangle is the most conservative use of led wall panels. It works, but it leaves a lot on the table. The modular format is what makes LED interesting for trade shows. You’re not limited to a screen on a stand. You can build the booth itself around the display surface.
We’ve used modular walls to create branded backdrops that wrap into side returns, reception counters that animate with product visuals, and booth entrances that feel more like stage sets than standard exhibits. That matters because the physical form and the content work together. If the wall shape guides traffic, the message lands before the rep starts the conversation.
Shapes change how people experience the booth
Curved layouts deserve more attention than they get. In real trade show traffic, people rarely face the booth straight on. Many approach from the side, glance while walking, or stand at odd angles in crowded aisles. Standard viewing angle claims don’t tell the whole story.
A useful reference on placement notes that curved led wall panels can boost effective viewing by 25% in trade show layouts where people see content from sharp angles, according to this guide on LED video wall viewing angles. We agree with the practical takeaway. Curves are not decorative fluff. They help more people see the content as intended.
If you’re planning a custom environment rather than a basic inline booth, modular structures like those used in a modular trade show booth give you more design freedom.
Three configurations we recommend often with LED wall panels
Immersive back wall: Best for product launches, software demos, and brand storytelling. Keep the main narrative on the center field and use side zones for motion texture or supporting visuals.
LED columns and portals: Strong for island spaces where attendees approach from multiple directions. These forms create visibility from farther down the aisle.
Reception counters with integrated motion: Useful when you want the first touchpoint to feel active instead of static. It can carry logo animation, product loops, or directional messaging.
Here is a visual example of how dynamic booth video can shape the whole environment:
Curved and sculptural LED works best when the content is designed for the form, not stretched from a flat template.
The common pitfall is buying the hardware idea before solving the storytelling problem. A dramatic structure with lazy content still underperforms. We push clients to match the shape to the audience flow and the content rhythm, not just the booth rendering.
Our White-Glove Turnkey Service for LED Wall Panels
Most LED projects go wrong. Not on the screen itself. In the handoffs.
One vendor handles the booth. Another handles the video wall. Someone else ships the pieces. A freelancer exports the content. Then show day arrives and your marketing team becomes the project manager for a technical installation they didn’t sign up to run.
We don’t think that’s acceptable. If you hire led wall panels for a trade show, you should not spend the event chasing cables, installer updates, or software issues.
What turnkey should actually include
A real white-glove process means one coordinated path from concept to teardown. We handle planning, booth integration, logistics, install, operation, and dismantle so your team can stay focused on customers.
Our pricing is also simple. We include everything except the charges the show bills you directly, such as electricity and material handling. Those venue bills come from the show. The rest is covered in our price.
That matters because a lot of cheaper proposals look fine until the add-ons start stacking up. Labor. Setup support. show-site fixes. content handling. On-site oversight. The invoice grows, and your team still carries the risk.
The on-site support difference
We leave an audiovisual technician onsite the entire time the trade show is open. If anything goes wrong, you text or call and within minutes an AV Technician is at your booth to resolve the problem.
That changes the experience completely. Your staff doesn’t need to troubleshoot playback. They don’t need to explain a signal issue to venue labor. They don’t need to stand in the aisle wondering whether the wall will come back online before the next demo.
Most exhibit problems are manageable. The real damage happens when no one owns the fix in the moment.
Why cheaper options often cost more
The low-price version of an LED wall usually cuts support first. You may get the hardware, basic setup, and a phone number. What you don’t get is accountability at the booth during live show hours.
That’s a bad trade. A trade show isn’t a warehouse install. It is a live sales environment with fixed deadlines and no tolerance for downtime during traffic peaks.
White-glove service protects you from:
Last-minute install surprises: Booth plans and display plans need to align before freight arrives.
Content mismatches: Screen dimensions, resolution mapping, and playback formatting have to be checked early.
Live-show failures: If an issue appears during booth traffic, somebody needs to own the repair immediately.
Team distraction: Your marketers should greet buyers, not coordinate technicians.
We’d rather be judged on a complete operating model than a bare hardware quote. That’s the right way to buy LED for events.
Rental vs Purchase Calculating the True Cost and ROI with LED Wall Panels
Most exhibitors should rent first. That’s our blunt advice.
If you exhibit occasionally, change booth sizes, or want flexibility across different shows, renting led wall panels is usually the smarter decision. You avoid storage, maintenance, refresh-cycle headaches, and internal technical ownership. You also keep the option to change configuration based on each event.
Buying makes sense when you exhibit frequently, use similar booth formats repeatedly, and have a clear plan for storage, transport, content management, and support. If you don’t have those pieces locked down, ownership can become a burden instead of an asset.
Rent when flexibility matters
Rental works well for launch campaigns, annual conferences, regional test programs, and brands that need different booth footprints over the year. It also fits teams that want a managed solution rather than becoming display operators.
The big advantage is operational simplicity. You get the visual impact without taking on long-term technical responsibility.
If you’re comparing options, use a transparent quote format and check what’s included. A useful starting point is to review video wall pricing for trade shows and compare that structure against competing proposals line by line.
Buy when repetition is predictable
Purchase is more defensible if your event calendar is stable and your booth architecture stays close to the same from show to show. In that case, the system can become part of your standard exhibit toolkit.
But don’t evaluate purchase on hardware alone. Include internal labor, logistics oversight, replacement planning, storage, and who supports the wall when something goes wrong at the venue. Many teams underestimate the management load.
ROI comes from outcomes, not just equipment cost
We look at ROI in three buckets.
First, brand perception. A sharper wall with P1.9 pitch presents content more cleanly than the common P2.5 competitor option mentioned earlier. That improves how polished your booth feels in close-range interactions.
Second, team productivity. If the booth runs smoothly and support is handled, your staff can focus on meetings, demos, and lead conversations.
Third, content visibility. Brightness has to match the hall. Indoor booths typically need 800 to 1,500 nits, while booths near windows or in brightly lit halls need 5,000+ nits to remain visible, and panels with adaptive brightness help maintain impact while avoiding sustained full-load operation, according to this overview of LED wall panel brightness and environmental use.
Don’t compare a managed rental to a bare panel quote. Compare complete outcomes against complete outcomes.
What to ask before approving either option
Use these questions in procurement conversations:
What’s included in the quoted price? If labor, integration, on-site support, or content handling sit outside the quote, your actual cost is higher than it appears.
Who owns show-site problem resolution? If that answer is vague, the risk falls on your team.
Is the pitch right for our audience distance? Cheap resolution compromises are easy to miss until the wall is already on the floor.
Does the system fit our booth environments? A panel that struggles in bright conditions undermines the whole investment.
The wrong LED wall isn’t just a visual downgrade. It’s a management problem waiting to happen.
Logistics and Content Tips for a Flawless Show
A strong LED booth is built long before install day. Most problems come from missed details in logistics or lazy content preparation, not from the display itself.
We handle the coordination work because it’s the part most exhibitors underestimate. Power requirements, load-in windows, rigging limitations, venue rules, freight timing, and floor conditions all affect how led wall panels get deployed. If nobody owns those details early, the booth becomes expensive improvisation.
Logistics details that matter
Before the show, we lock down the practical issues that can derail setup:
Power planning: The venue has to know what the system needs, and your order has to match the actual booth design.
Material handling expectations: Show-site handling affects timing and budget, so it needs to be accounted for early.
Install sequencing: The LED structure, graphics, lighting, and any product demo stations have to be installed in the right order.
Freight protection: Proper packing matters. If your team wants a useful outside perspective on transport protection, this guide to crating for shipping is worth reviewing.
Content that works on LED Wall Panels
Too many brands take desktop presentation content and push it onto a massive wall. That usually looks weak. LED content should be built for motion, distance, and fast comprehension.
Use these rules:
Lead with motion, not paragraphs. Attendees should understand the category or message at a glance.
Keep text minimal. Sales reps can explain. The wall should attract and reinforce.
Use high-contrast visuals. Booth environments are busy, and subtle design often disappears.
Build short loops. Repetition is fine if the sequence is clean and easy to enter at any point.
Design for the structure. A curved wall, counter, or column needs custom framing and motion logic.
Good booth content doesn’t try to say everything. It gives your reps a stronger opening.
We also push teams to review content in the actual mapped canvas size before the event. A file that looks balanced on a laptop can feel cramped or empty on a large-format LED surface. That final pre-show review saves a lot of regret.
Exhibitor Questions About LED Wall Panels Answered
What if the wall fails during show hours
That depends on the service model you bought. This is exactly why we insist on on-site technical coverage for live events. If support lives somewhere off-site, your staff becomes the middle layer between the booth and the fix. That’s slow and avoidable.
Do we need special content for led wall panels
Usually, yes. You can repurpose existing assets, but they often need to be reformatted for the wall shape, viewing distance, and motion pacing. A good starting resource if you’re comparing approaches in a major event market is this Trade Show Booth LED Technology Las Vegas Guide, which helps frame the practical differences between booth LED applications.
Are LED wall panels only for large island booths
No. They work in smaller spaces too. The mistake is assuming LED only makes sense at massive scale. A compact booth can benefit a lot from one sharp visual surface if the content and structure are designed with discipline.
How much control do we have over messaging
A lot. That’s one of the biggest advantages. You can rotate loops, update product visuals, change messaging by audience, and tailor the content to the event goal. If you want a deeper look at common setup and planning concerns, review these LED video wall FAQs.
What’s the biggest buying mistake exhibitors make
They buy on panel price instead of show performance. The cheaper quote often excludes support, compromises resolution, or ignores the booth’s real lighting and traffic conditions. That’s how a “deal” turns into a distraction for your team.
If you’re planning a booth and want led wall panels that are handled end to end, talk with LED Exhibit Booths. We can help you evaluate the right pitch, configuration, service model, and show strategy so your booth works on the floor, not just in the rendering.
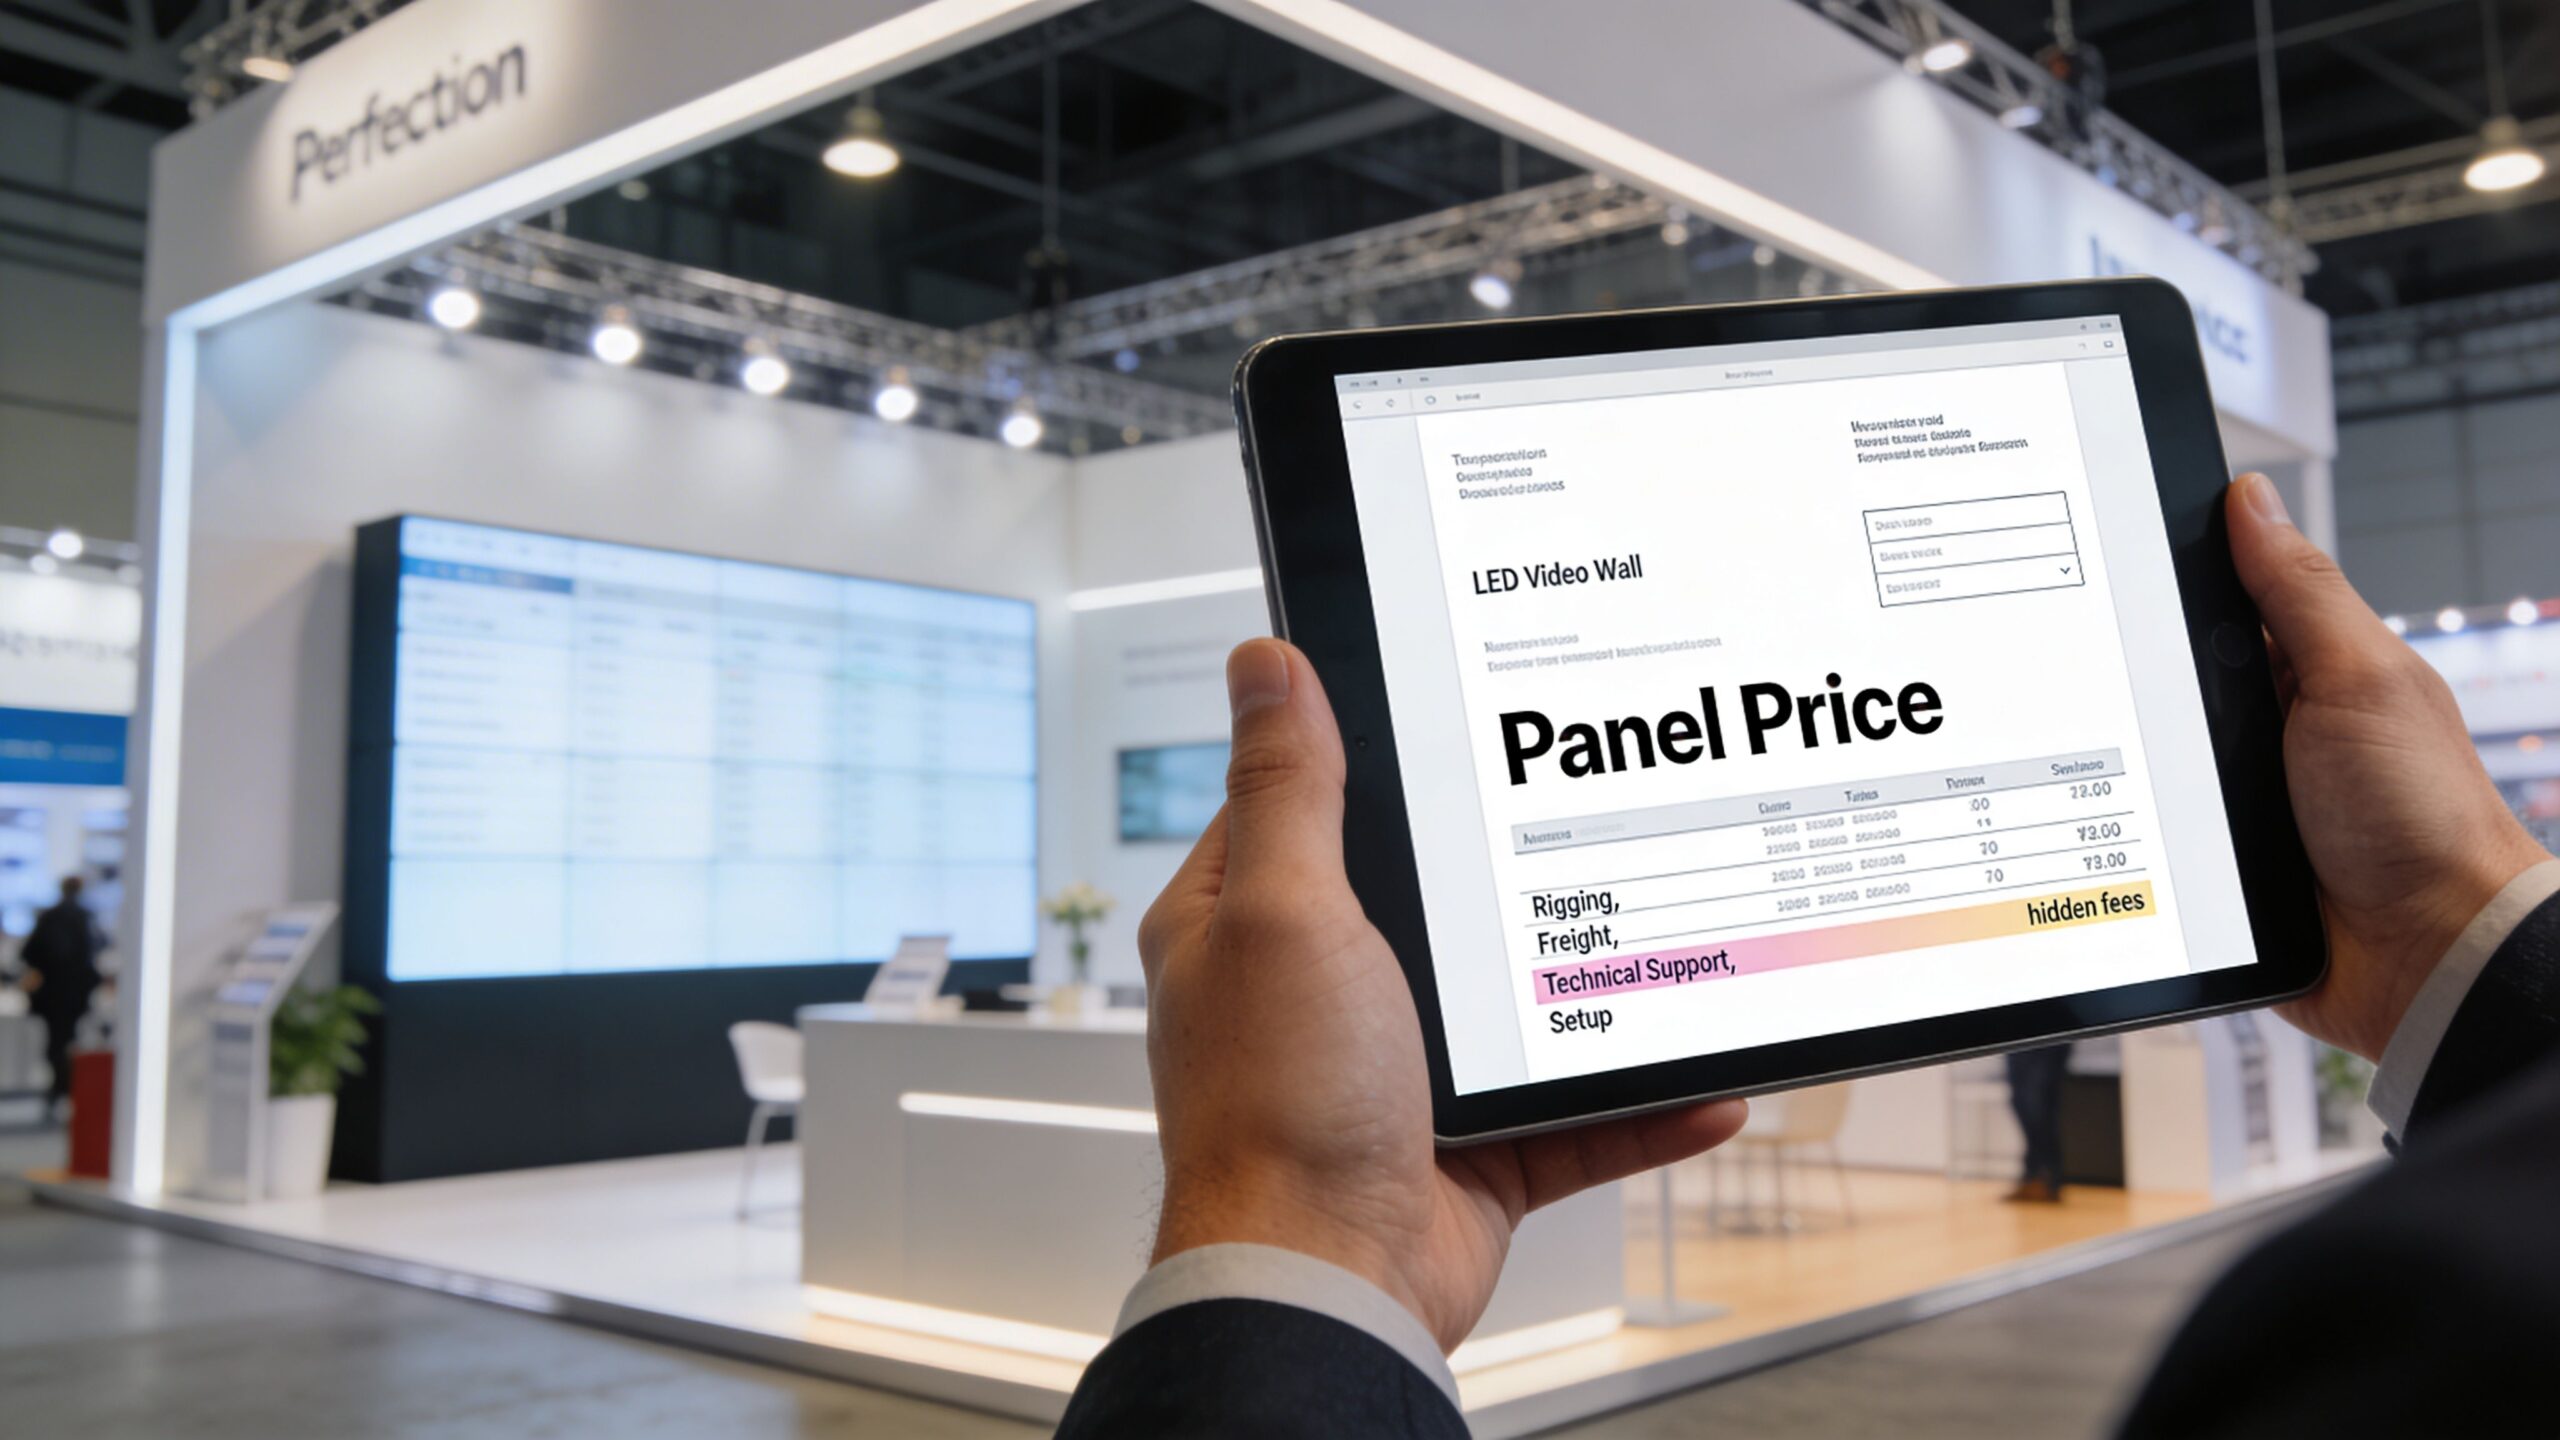
You are looking at two wildly different quotes right now for an LED video wall price.
One vendor gave you a low panel price that looks manageable. Another gave you a much higher number and said it is “turnkey.” Then your exhibit house mentioned labor. Your show manual mentioned electrical. Your operations team brought up shipping. The led video wall price is no longer one number. It is a stack of costs, responsibilities, and risk.
That confusion is normal in trade shows. Online price guides usually talk about hardware. Exhibitors pay for outcomes on a show floor.
Why Is Calculating LED Video Wall Price So Hard
A marketing manager usually starts with a simple budgeting question. “What does a video wall cost for our booth?” The answer should be straightforward. It rarely is.
The first quote might only cover panels. The second might include processing, setup, teardown, and support. A third might sound cheap until you realize it assumes your team will coordinate freight, labor, and troubleshooting. On paper, all three are “video wall” quotes. In practice, they are completely different products.
Trade show buyers run into this constantly. They see a beautiful wall online, ask for pricing, and get a number that does not explain what happens between the warehouse and the show floor. That gap is where budgets get blown.
If you are pricing a booth display, you need to separate hardware cost from event cost. Those are not the same thing. A panel price tells you what the screen costs. It does not tell you what it takes to get that screen into your booth, make it look right, keep it running, and solve problems when the hall opens.
A useful starting point is understanding the difference between raw panel specs and a show-ready system such as an LED panel for video applications. Buyers who skip that distinction usually compare quotes that should never be compared side by side.
The hard part is not finding a number. The hard part is finding the number that reflects what you will spend to exhibit successfully.
What Determines the LED Video Wall Price
The led video wall price starts with the screen, but the screen is only one layer. Several technical choices shape the final number, and each one affects image quality in a visible way.
Pixel pitch changes what people see
Pixel pitch is the distance between LED clusters. Smaller pitch means tighter pixel spacing. Tighter spacing means a sharper image at closer viewing distances.
That matters at trade shows because attendees do not stand fifty feet away. They walk right up to the booth. They take photos. They watch demos from a few feet away. A wall with 1.9 pitch looks noticeably cleaner in that environment than the 2.5 pitch walls many competitors use.
This is similar to comparing two TVs of the same size with different resolution. From across the room, both may seem acceptable. Up close, one looks crisp and premium. The other starts to show its structure.
Size and shape affect more than material cost in the video wall price
A bigger wall costs more, but size alone does not tell the whole story. Configuration matters.
A simple flat back wall is easier to price and deploy than a structure with returns, corners, columns, arches, or suspended sections. Custom geometry affects how many tiles are needed, how they are framed, how content is mapped, and how much labor the setup requires.
If you are still deciding layout, reviewing common video wall sizes helps narrow the discussion before you start collecting quotes.
Indoor quality lives in a different price band
For 2025, the average cost of LED video walls ranges from $800 to $2,500 per square meter, with fine-pitch indoor displays at $2,000 to $2,500 per square meter and large-pitch outdoor displays at $800 to $1,200 per square meter, according to this 2025 LED video wall cost guide.
That range explains why broad online searches can be misleading. A low outdoor billboard number does not tell you much about the cost of a fine-pitch indoor wall for a convention center booth.
Brightness and environment matter and change the video wall price
Trade show halls are tricky lighting environments. Some booths sit under harsh overhead fixtures. Others face open entrances, windows, or bright neighboring displays.
You need enough brightness to hold contrast without washing out content. But brightness is not a spec to chase blindly. Paying for outdoor-level intensity in an indoor booth can be unnecessary if the environment does not require it.
A good quote should account for where the wall will be used, not just list a generic brightness figure and move on.
Processing is the part many buyers miss
Panels display the image. Processing and control systems make the wall behave like one seamless screen.
That means scaling, synchronization, color uniformity, refresh behavior, source switching, and signal stability. If this side of the system is weak, the wall may still power on, but it will not perform cleanly during live demos, camera moments, or fast-moving content.
A smart buyer asks questions about the video wall price like:
What processor is included
How is content scaled to the wall resolution
Will the wall handle live video cleanly
Who manages calibration and signal testing on site
Cheap visual hardware paired with weak processing is one of the fastest ways to make an expensive booth look amateur.
Should You Rent or Buy Your Trade Show Video Wall
This decision is less about technology and more about operating model.
Some exhibitors should buy. Most should rent. The right choice depends on show frequency, internal staff capacity, storage tolerance, and how much risk your team is willing to manage.
When buying makes sense
Buying can work if your company exhibits often, uses a consistent booth footprint, and has people who can manage logistics. Ownership gives you control over the asset and lets you standardize a repeatable look.
It also creates obligations. Someone must store the wall, maintain it, track damage, arrange freight, coordinate labor, confirm compatibility, and handle repairs. If your event team is already stretched, ownership often shifts work onto people who were never hired to be AV managers.
There is also the technology question. The global LED video wall display market is projected to grow from US$6.85 billion in 2025 to US$15 billion by 2032, and some panel costs have dropped by nearly 50% in the last four years, which is one reason many exhibitors prefer renting instead of tying capital to hardware that may age quickly, as noted by LEDinside’s market outlook.
If your finance team is weighing ownership structure, this practical guide to equipment financing versus leasing is a useful read before you commit.
Why renting fits trade shows better
Rental aligns with how trade show programs operate. Booth sizes change. Creative changes. Cities change. Labor rules change. Your display strategy may need to adapt from one event to the next.
With a rental, you are not stuck defending an older asset just because you own it. You choose the system that fits the event. You avoid storage headaches. You avoid maintenance planning. You avoid being the person who discovers a damaged tile the morning before install.
Rental also simplifies internal budgeting. Marketing teams usually care about one clean event number. They do not want to split costs across capital equipment, warehouse handling, service contracts, and repair contingencies.
Ownership works best when your company wants to run a display program. Rental works best when your company wants to run trade shows.
Beyond the Panel Price Hidden Trade Show Fees Add to the LED Video Wall Price
The panel quote is where many exhibitors get trapped.
A purchased wall may look cost-effective until the event-specific charges start landing. Those charges are not side notes. They are often the difference between a manageable program and a painful surprise.
Drayage and labor are not optional details
For trade show exhibitors, total cost of ownership often includes overlooked costs like drayage at $50 to $100 per hundredweight and union labor at $75 to $150 per hour per technician, which can add $3,500 to $8,000 per event to a purchased wall. The same source notes that modular, toolless systems can cut those labor costs by 50 to 70 percent, according to this review of trade show LED wall ownership costs.
If you have not dealt with drayage before, it is the venue’s material handling charge. Your crate arrives. The venue or general contractor moves it from receiving to your booth and back out again. You pay for that movement whether the product inside is cheap or premium.
Union labor is similar. In many cities, your own staff cannot build everything themselves. Certified labor crews may be required for setup and dismantle. The more complicated the system, the more hours you buy.
Other costs that hit later add to the total LED video wall price
These line items often appear after buyers think they are done budgeting:
Shipping and freight: Especially painful when timing is tight or the system needs special handling.
On-site coordination: Someone must receive, inspect, and manage the equipment.
Electrical service: Ordered through the show, not the vendor.
Troubleshooting coverage: If no one stays with the wall, your team becomes first response.
Damage exposure: Purchased inventory can create repair or replacement costs after the event.
A lot of exhibitors miss these items during early planning. This guide on budgeting for your trade show is worth sharing with anyone on your team who touches operations, procurement, or event finance.
Why the cheapest quote often stops being a cheap LED video wall price
A low upfront number usually means one of two things. Either the quote excludes major services, or the system requires more support than the buyer expects.
That is why logistics planning matters as much as panel selection. If your team is moving displays across events, understanding the practicalities of shipping trade show materials is part of pricing the wall.
A panel-only quote is not a trade show budget. It is one line in a trade show budget.
The All-Inclusive Advantage of a Turnkey Rental
The strongest rental model removes work, not just cost.
That matters because show teams do not need one more vendor to coordinate. They need one accountable partner who handles the display from pre-show planning through move-out.
What turnkey should mean in real life
A true turnkey rental includes everything needed to get the wall designed, delivered, installed, operated, and removed, except the charges the show bills you directly. In practice, that usually means the show bills for electricity and material handling. The display partner should be covering the rest.
That all-inclusive structure is valuable because it eliminates gray areas. You are not wondering who owns calibration. You are not guessing whether labor is included. You are not finding out on install day that signal distribution was “outside scope.”
White glove service is part of that. Not a marketing phrase. Execution.
Resolution matters on a crowded floor
For trade shows, 1.9 pitch is a meaningful quality threshold. It gives exhibitors a sharper, more refined image at typical booth viewing distances than the 2.5 pitch systems that are still common in the market.
That difference shows up in text, product renders, motion graphics, and close-up conversations. It also affects how premium your booth feels from the aisle. Buyers may not know the term pixel pitch, but they absolutely notice image quality.
The processor matters as much as the panel and influences the LED video wall price
Video processing and control systems can represent 20 to 40 percent of an LED wall’s total cost, and using high-end processors with refresh rates of 3840Hz+ is critical for preventing flicker and moiré on camera during live demos, according to Neoti’s breakdown of LED video wall cost and processing requirements.
This is one of the biggest gaps between professional rentals and bargain packages. Cheap packages often focus attention on the wall surface while downgrading the processor behind it. That is a mistake if your booth includes presentations, product demos, filming, interviews, or any content people will view up close.
On-site support changes the risk profile but doesn’t add to the LED video wall price
One of the most underrated parts of a good rental is having an audiovisual technician on site for the full time the show is open. Naturally, many vendors charge extra if you want an AV Technician on call. However, we include that peace of mind in the price. Obviously, it costs money to fly the audiovisual technician back home after setup and costs money to fly the technician back to dismantle the booth at the end of the show. For that reason, we prefer to simply leave our AV Technician at the show the entire time the show is open. Consequently, you get peace of mind knowing someone is just a phone call away. At the same time, we aren’t flying people back and forth.
That changes everything. If content fails, if a source drops, if settings need adjustment, your booth staff does not stop selling to troubleshoot a display. They text or call, and someone resolves it quickly.
A proper LED video wall rental should not end at installation. Trade shows are live environments. Support during show hours is part of the product.
The best rental quote is not the one with the lowest starting number. It is the one that leaves your team free to meet customers while the display runs without drama.
Real-World LED Video Wall Price Examples
Most buyers do not think in cost per square meter. They think in booth formats. That is the practical way to budget.
The examples below are not panel-only numbers. They are typical turnkey rental ranges for common trade show scenarios. Final pricing depends on show city, booth design, content complexity, duration, rigging needs, and support scope.
Sample turnkey rental ranges
Booth Size
Common Configuration
Typical Turnkey Rental Range
10×10 inline
Single LED back wall
Custom quote based on show, but maybe $20,000 – $25,000
10×20 inline
Full back wall with integrated demo area
Custom quote based on show, but maybe $30,000 – $40,000
20×20 island
Multi-sided LED structure, columns, or archway
Custom quote based on show, but maybe $40,000 – $60,000
Small product launch space
LED feature wall plus branded counter
Custom quote based on show, but maybe $20,000 – $25,000
Why examples stay custom
Two booths with the same footprint can price very differently.
One may use a simple rectangular wall and looped brand content. Another may need custom framing, live presentations, source switching, embedded product messaging, and full-time technical oversight. Same size. Very different led video wall price. Plus, the number of days the show is open matters. Of course, labor costs are higher in a union city compared with a non-union city. Additionally, if the setup or dismantle is on a weekend or holiday then labor cost are higher.
This is also why experienced vendors ask better questions at the start:
What city is the show in
How many open days
Is the wall camera-facing
Will you run live demos or only playback
Do you need the structure to do more than act as a backdrop
A better way to use sample numbers
Use examples to set expectations, not to lock a budget prematurely.
If you need a rough planning number, ask for a turnkey estimate tied to your booth size, your city, and whether support stays onsite during show hours. That will get you much closer to reality than shopping by panel dimension alone.
One practical note from the field: a smaller wall with excellent content and clean support usually performs better than a larger wall that your team cannot manage confidently. On crowded floors, reliability and polish beat raw size.
Smart Ways to Reduce Your Video Wall Price Budget
Reducing cost does not mean chasing the cheapest wall. It means cutting waste while protecting the parts attendees notice.
Book early and lock the right scope
Last-minute design changes create expensive problems. So does waiting too long to reserve inventory, labor, and freight windows.
Early planning gives you better control over screen size, content formatting, and booth integration. It also gives your vendor time to recommend a simpler structure if one will accomplish the same visual goal.
Reuse content intelligently
Trade show content gets expensive when every show starts from zero.
Build motion graphics, product loops, and branded background elements that can be adapted across events. Then create only the event-specific pieces fresh. That approach keeps the wall dynamic without forcing a full content rebuild every time.
Design for modularity
A modular tile system gives you options. The same general package can often be reconfigured for different footprints or creative concepts.
That is much better than specifying a one-off structure that only fits one booth layout. Buyers save money when they plan a display system that can evolve with the event calendar.
Trim complexity first: Simplify shapes before cutting image quality.
Protect resolution: Fine pitch is usually worth preserving in close-viewing booths.
Ask about included support: Cheap packages become expensive when small issues require emergency fixes.
If you must choose, reduce size before you reduce reliability.
Your Video Wall Rental Questions Answered
How far in advance should I book
Earlier is better, especially for major shows. Good inventory, experienced labor windows, and thoughtful content prep all get tighter as the event approaches.
Is a 1.9 pitch wall really better than 2.5
Yes, for typical indoor trade show viewing distances it is visibly sharper. Text reads cleaner, motion looks more refined, and close-up conversations happen in front of a more premium image.
What should be included in a turnkey quote
Everything needed to deliver, install, operate, and remove the wall should be clearly included, except the charges the show bills directly, such as electricity and material handling.
Do I need an on-site technician
For a serious trade show program, it is a strong advantage. If anything changes or fails during show hours, your booth team should stay focused on attendees, not screens.
Should I buy if I exhibit often
Maybe, but only if your organization can manage storage, freight, setup coordination, maintenance, and repair responsibility without straining the event team.
What is the biggest mistake buyers make
They compare a panel quote with a turnkey quote as if both represent the same thing. They do not. One prices equipment. The other prices execution.
If you want a clear, all-in quote instead of another vague hardware number, talk to LED Exhibit Booths. Our turnkey rental model includes everything except the charges the show bills you directly, such as electricity and material handling. As a result, you get higher-resolution 1.9 pitch video walls, white glove service, and an on-site AV technician throughout show hours so your team can focus on customers, not troubleshooting.
Understanding Video Wall Pricing: The Ultimate Guide for Smart Exhibitors
Trade shows are very busy events. Hundreds of brands try to get the attention of the same people. Because of this, standard poster boards do not work well anymore. Instead, smart companies now use seamless technology to stand out. However, you’ll want to take a look at video wall pricing to see if it fits within your budget.
If you want to make a huge impact, a seamless display is the best choice. However, most companies want to know about the cost to rent a video wall before they start. Buying or renting an LED display requires a clear budget. This guide will help you understand the true costs of these systems. Therefore, you can make the best choice for your next trade show.
What Changes the Cost of a Video Wall?
The price of an LED setup is never just one flat number. In fact, many different things change the final cost. By understanding these items, you can easily control your budget.
1. The Size of the Display
First, the overall size of the screen is a huge factor.Naturally, larger walls require more individual LED panels.Therefore, a bigger display will always increase the video wall pricing final cost. For example, a small 10-foot wall will cost less than a massive custom island booth.
2. Pixel Pitch and Resolution
Second, you must look at the pixel pitch. This term means the distance between the tiny LED lights on the screen. If the pixels are close together, the image looks very sharp from a few feet away.For instance, our premium screens have a pixel pitch of just 1.9 millimeters. Consequently, attendees can stand right next to your booth and see a beautiful, crisp image. Finer pixel pitches cost more money, but they are necessary for trade show booths.
3. Installation and Hardware Requirements
Third, traditional video walls often require heavy metal frames or trusses. These extra parts can make shipping and labor very expensive. Fortunately, our special system is different. Our LED panels connect quickly with strong magnets. Next, they lock together without any tools. As a result, you save money on setup time and shipping.
Video Wall Pricing: Rental vs. Purchase
When you look at video wall pricing, you must make a big choice. Should you buy the equipment, or should you rent it? Both options have great benefits depending on your goals.
Why You Should Rent an LED Exhibit Booth
Renting is the most popular choice for many businesses. This is true because technology changes very fast. If you buy a system today, it might become outdated in a few years. Additionally, renting allows you to change your booth design for every single show. For example, you can rent a 10-foot video wall for a small event. Later, you can choose a massive display for your biggest annual convention.
Furthermore, renting keeps your upfront costs much lower. Our rental packages include full support, so you do not have to worry about maintenance.
When Buying Makes Sense
On the other hand, purchasing a system can be smart if you go to dozens of events every year. If you use the exact same setup constantly, the long-term cost per show goes down. However, you must remember the costs of storage, shipping, and technical labor.
How We Make Video Wall Pricing Affordable
At LED Exhibit Booths, we want to deliver the best value. In the past, companies simply attached heavy screens to regular walls. This old method looked messy because people could see ugly gaps and wires.
Conversely, our LED panels are the actual walls of your booth. We custom built our panels to be exactly 496 by 496 millimeters. Because of this design, they fit perfectly into standard trade show spaces. Consequently, you do not need separate monitors or separate walls.
We also use 45-degree edges on our equipment.As a result, we can create seamless corners, columns, and arches. You get a beautiful display without spending extra money on complex custom frames.
Get a Custom Video Wall Pricing Quote Today
To sum up, video wall pricing depends on size, resolution, and your choice to rent or buy. Because every brand has unique goals, we custom design every single booth. Plus, we have years of experience designing custom trade show booths.
Are you ready to amaze your audience? Contact LED Exhibit Booths today. We will give you a clear, honest price quote for your next successful event.
The Ultimate Guide to LED Screen Rental for Trade Shows and Events
Are you planning your next big trade show? If so, you know how hard it is to stand out from the crowd. Most event halls are filled with repetitive rows of boring poster boards. Fortunately, you can easily break through the noise. An led screen rental is the absolute best way to attract attention and drive traffic to your booth.
At LED Exhibit Booths, we take trade show displays to the next level. In fact, we do not just attach a basic TV to a wall. Instead, our state-of-the-art video screens actually become your exhibit booth.
Keep reading to discover how a professional led screen rental can transform your event presence, lower your costs, and maximize your return on investment.
Why Choose an LED Screen Rental Over Buying?
Technology moves fast, and trade show technology moves even faster. For example, pixel pitch and resolution improve every single year. Therefore, buying a video wall can be a risky financial choice. Your expensive equipment might become outdated by next season.
Choosing an led screen rental solves this problem completely. First, it allows you to always use the newest and sharpest technology on the market.Second, it saves you from the massive upfront costs of purchasing. Finally, a rental means you do not have to worry about long-term storage or maintenance.
The Seamless Advantage: No Gaps, No Trusses
In the past, companies created large displays by grouping traditional monitors together. Consequently, viewers could always see the ugly plastic borders and gaps between the screens. Furthermore, those old systems required bulky metal trusses and a messy web of cords.
Our modern led screen rental options completely eliminate these eyesores. We use high-powered magnets and a clever toolless locking system to align our panels perfectly.As a result, your content flows smoothly across one giant, uninterrupted surface. Plus, since our video walls are so easy to put together, you’ll save on labor costs too!
Additionally, because our panels are lightweight and self-supporting, you do not need heavy trusses.Consequently, you will save a significant amount of money on shipping and drayage fees at the convention center.
High Resolution for Close-Up Viewing
When people walk past your booth, they are often just a few feet away. For this reason, resolution matters immensely. If your screen has a poor pixel pitch, your images will look blurry and pixelated up close.
Thankfully, we offer ultra-high-resolution LED screen rental panels with a tight 1.9mm pixel pitch. What does this mean for your brand? It means that attendees can stand right next to your display and still see crisp, breathtaking video. From vivid product demonstrations to live social media feeds, your content will look stunning from every single angle.
Endless Custom Options for Every Space
Every brand is unique, and your booth should reflect your specific identity. Because our LED panels are modular, we can build custom setups of any size or shape. Plus, we can help with video production. Additionally, our full service ad agency has plenty of experience in trade show giveaways and literature design.
Entire LED Screen Rental Booths: We can construct your entire booth out of video panels.This includes flat walls, seamless 45-degree corners, and curved surfaces.
Partial Video Walls: If you want to keep costs down, we can mix beautiful printed graphic panels with sections of live video.
Small Space Solutions: Do you have a smaller 10×10 foot space? Do not worry, because we offer specialized 10-foot video wall rentals designed specifically for smaller layouts.
Full-Service Support for Peace of Mind
Planning a trade show is highly stressful, but your technology should not add to that anxiety. Because we began as a full-service advertising agency, we handle everything for you.
We do not just drop off the equipment at the loading dock. Instead, we provide complete, full-service support.We can help you design eye-catching video content before the show. Next, we assist with the technical setup. Best of all, we include a professional audio-visual technician to monitor your display during the entire event. As a result, you can stay focused entirely on your clients and closing new deals.
Ready to Stand Out With Our LED Screen Rental?
Do not let your company blend into the background at your next event. An led screen rental from LED Exhibit Booths will ensure you are the main attraction on the show floor.