
Hanging signs for trade shows are those big, custom-branded displays you see suspended from the ceiling high above an exhibitor’s booth. Think of them as a massive aerial beacon, making your brand impossible to miss, even from clear across a packed convention center. Their whole job is to ensure attendees can find you, no matter how chaotic the show floor gets.
Why Hanging Signs Are Your Booth’s Lighthouse
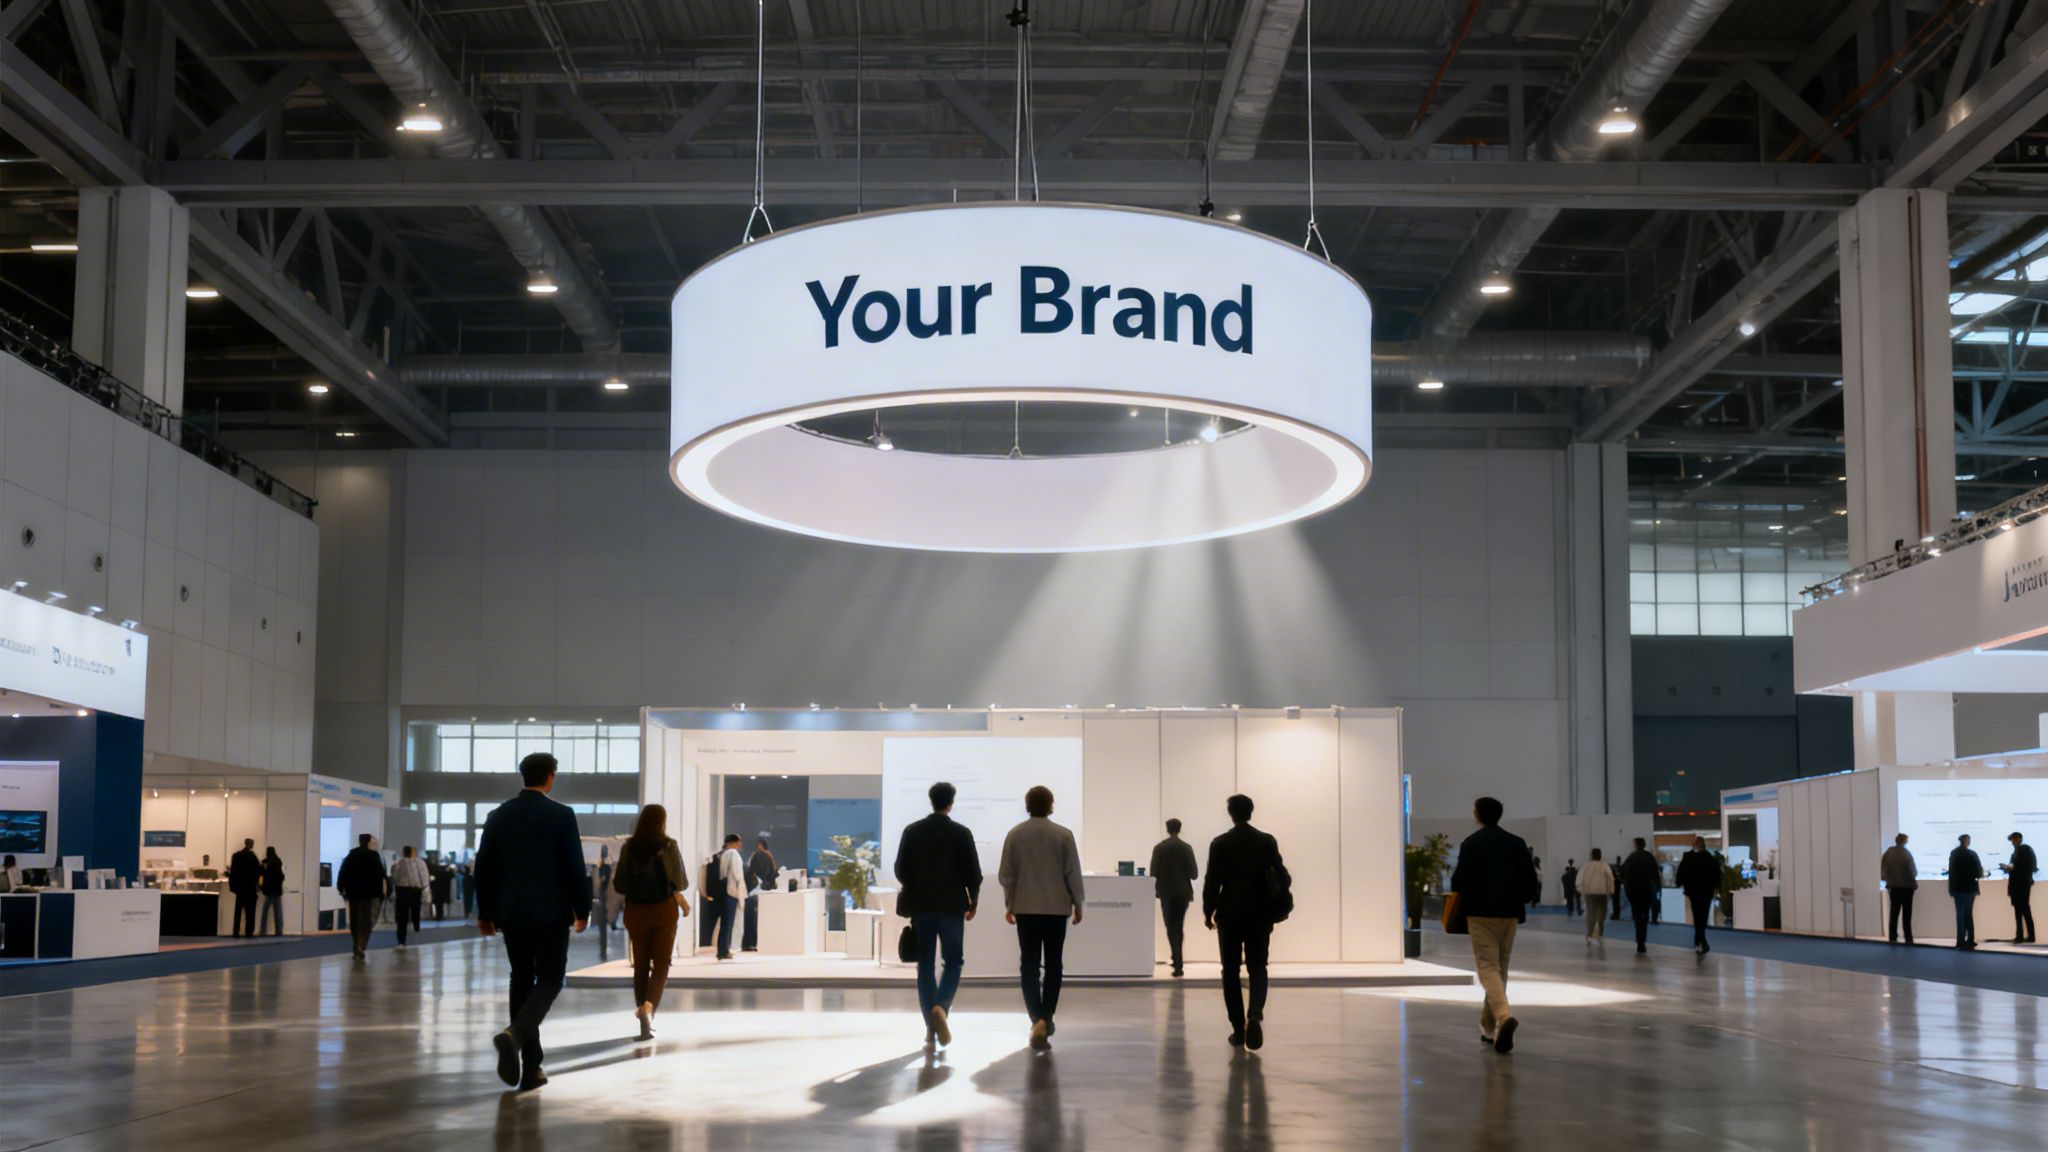
Picture a sprawling trade show floor, crammed with thousands of people and hundreds of your competitors. It’s a sea of visual noise. In that kind of environment, even a great 10×10 or 20×20 booth can completely disappear. A hanging sign for your trade show booth acts like a lighthouse, cutting right through the chaos to guide prospects directly to you.
This isn’t just about being seen, either. It’s about establishing a real presence and authority. An overhead sign tells everyone that your brand is a serious player, confident enough to invest in being seen. It’s often the very first impression you make on an attendee scanning the horizon for industry leaders.
Maximizing Visibility and Attracting Foot Traffic
The main job of a hanging sign is to solve the problem of ground-level marketing. While your booth staff and displays are great for engaging visitors up close, the hanging sign does the heavy lifting of pulling them in from far away. Its elevated position guarantees your logo isn’t blocked by crowds or other booths.
This long-distance visibility directly boosts your foot traffic. Attendees often use big hanging signs as landmarks to get their bearings on the floor. By making your brand a key reference point, you grab the attention of people actively looking for you and those just wandering the event.
A well-designed hanging sign transforms your booth from a destination that must be found on a map to a landmark that can be seen from almost anywhere on the show floor.
That initial visual contact is crucial. It plants a seed in an attendee’s mind, making them more likely to swing by your booth later, even if they were originally headed somewhere else. It’s an investment in constant, passive brand exposure. As you look at your options, you might also want to explore the various types of LED trade show signs that offer dynamic and even more eye-catching alternatives.
The Power of Superior Visual Technology
While traditional fabric signs are pretty common, the technology behind them makes a huge difference—especially when you get into digital options. For instance, the clarity of an LED hanging sign or video wall is all about its pixel pitch. Our video walls feature a tight 1.9 pitch, while many competitors are still using a less detailed 2.5 pitch. What that means for you is our displays deliver much higher resolution for sharper graphics and smoother video that really stops people in their tracks.
We also know that navigating the costs can be a headache. We simplify it by including everything in our pricing except for the bills you get directly from the show itself, like for electricity or rigging. This straightforward approach gives you budget certainty and gets rid of any nasty surprises from hidden fees.
To help you keep these points straight, here’s a quick reference guide.
Hanging Sign Quick Reference Guide
This table sums up the key things to think about when considering a hanging sign for your next event.
| Consideration | Key Takeaway |
|---|---|
| Visibility | Acts as a “lighthouse” to guide attendees to your booth from across the show floor. |
| Foot Traffic | Directly increases the number of visitors by making your booth an easy-to-find landmark. |
| Brand Perception | Projects an image of authority, confidence, and leadership within your industry. |
| Technology | The pixel pitch of an LED sign (like our 1.9 pitch) determines visual quality. Lower is better. |
| Budgeting | Look for transparent pricing that bundles costs to avoid hidden fees from rigging and labor. |
Ultimately, a hanging sign is one of the most effective tools for standing out and making sure your investment in a trade show pays off. However, if you need a more affordable trade show booth we have those too!
Designing a Hanging Sign That Captivates and Converts
A hanging sign’s size gets you seen, but it’s the design that actually pulls people into your booth. In the chaos of a trade show floor, you’ve got just a few seconds to make an impression from a distance. An effective design isn’t just about looking good; it’s about turning a faraway glance into a real conversation.
The main goal here is instant recognition. We call it the “5-second rule“: someone standing 100 feet away should be able to see who you are and what you do in five seconds or less. To pull that off, you have to keep things simple and clear.
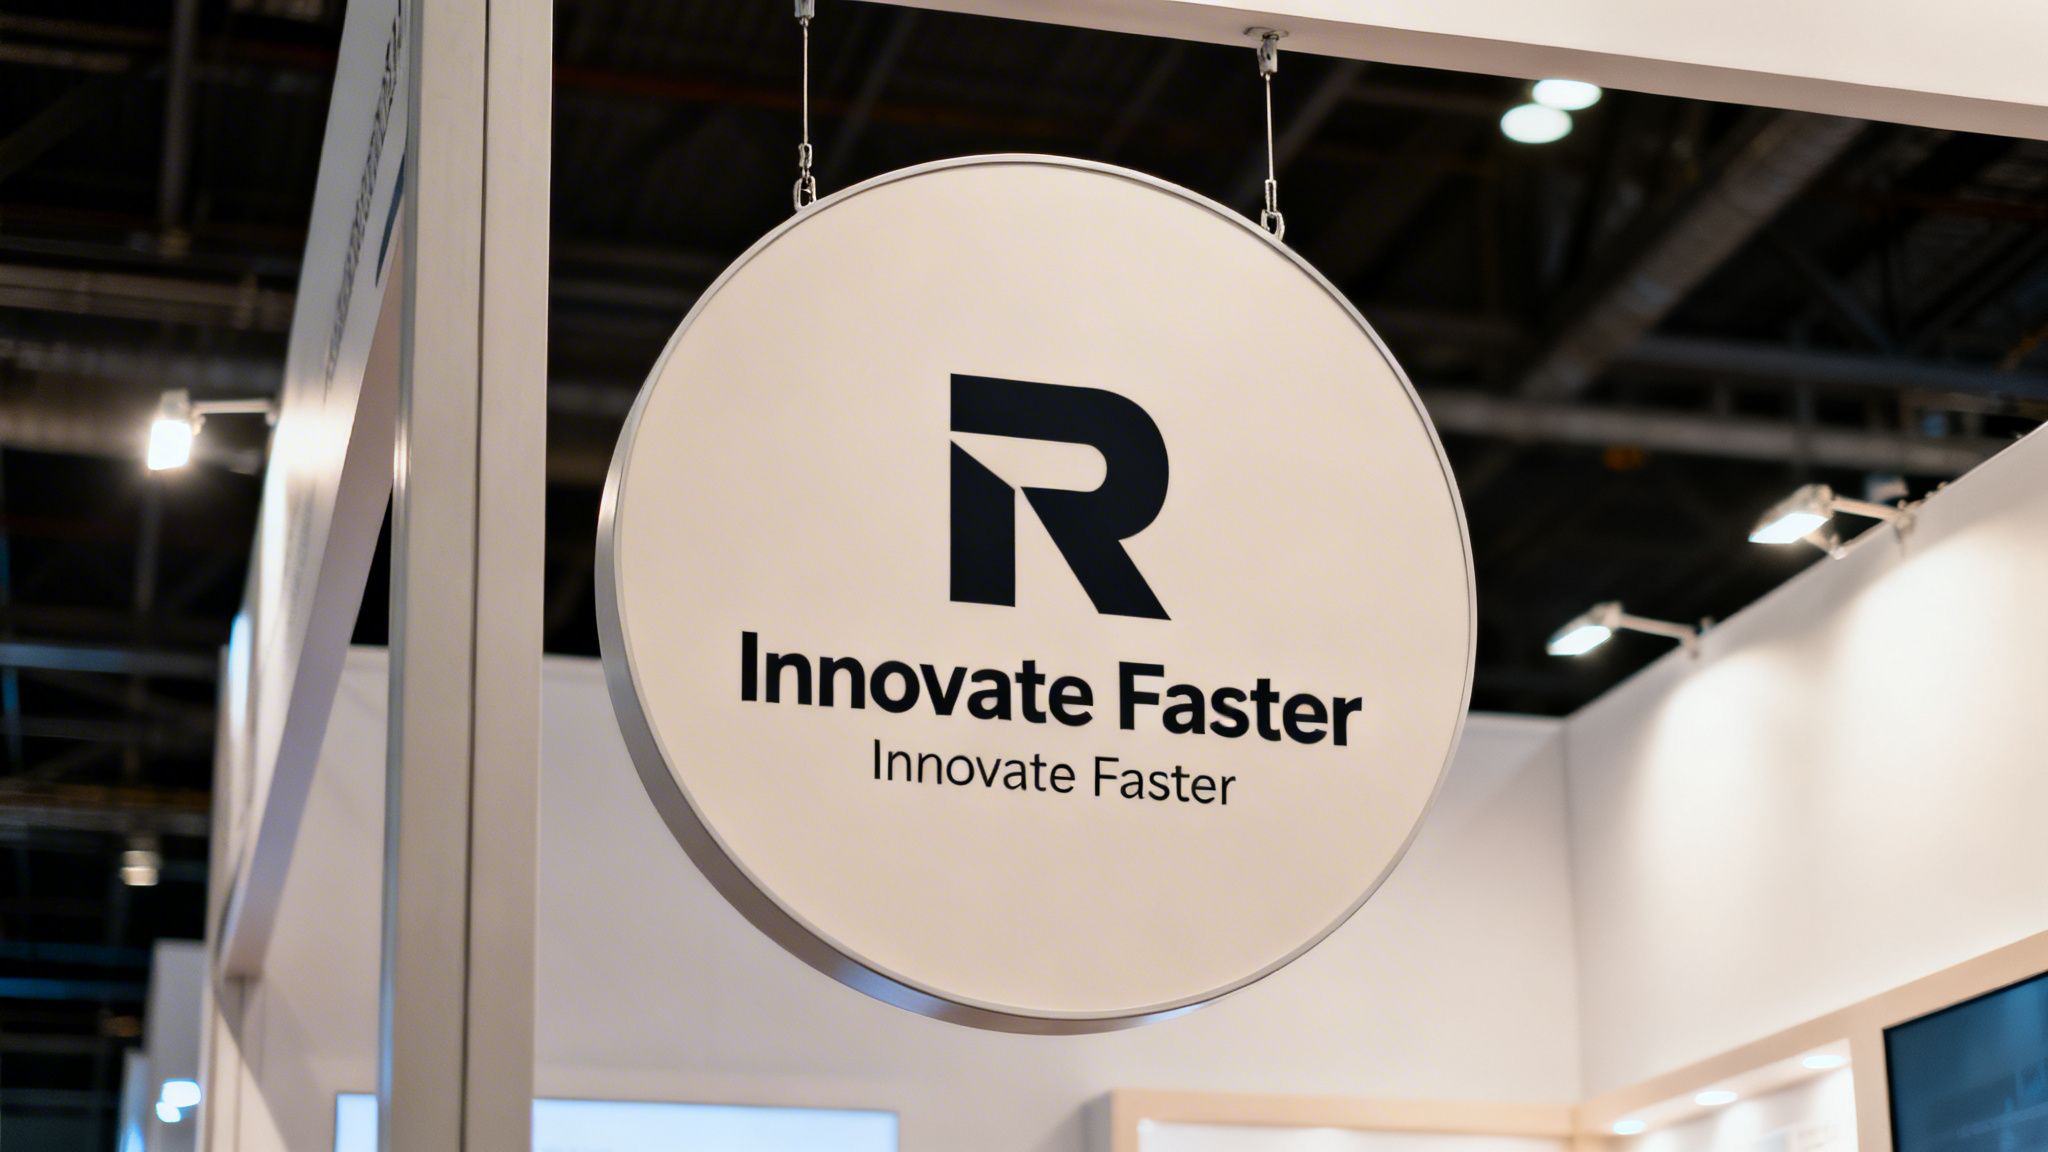
You might be tempted to cram your sign with every last feature and benefit. Don’t. Stick to the absolute must-haves—your logo and a very short, punchy tagline. This clean approach makes sure your message gets through loud and clear, even when an attendee is just walking by.
The Foundation of an Effective Design
The most important things for long-distance visibility are contrast and legibility. Your hanging sign is no place for subtle color shifts or fancy, delicate fonts. Success comes from making bold choices that won’t get lost in the bright lights and visual clutter of a convention hall.
Here are the key elements to get right:
- Bold Typography: You’ll want to use clean, sans-serif fonts that are easy to make out from across the hall. The font needs to be thick enough to stay sharp and not look blurry from a distance.
- High-Contrast Colors: This is crucial. Pair light and dark colors so your logo and text really pop. Think classic black on white, yellow on black, or a dark blue on a pale background. Stay away from low-contrast combos that look washed out under bright expo lighting.
- Minimalist Messaging: Focus on one powerful message. Your logo is the star of the show. Back it up with a tagline of no more than three to five words that nails your value proposition.
Think of your sign like a highway billboard. A driver has only a split second to read it, so the message has to be incredibly simple and direct. Your trade show hanging sign operates on the exact same principle.
Effective hanging sign design isn’t about showing everything your company does; it’s about creating enough intrigue from 100 feet away to make an attendee want to walk over and learn more.
This focused approach lets your sign do its one job: act as a giant beacon that guides interested prospects straight to your booth. Once they get there, your booth displays and your team can take it from there.
Choosing a Shape That Reinforces Your Brand
The shape of your hanging sign is another chance to make a statement. A standard square or circle is always a safe choice, but thinking outside the box can help you stand out and reinforce what your brand is all about.
Here’s how different shapes are often perceived:
- Circular Signs: Circles tend to give off a feeling of unity, community, and forward motion. They are easy on the eyes and can feel modern and friendly.
- Square/Rectangular Signs: These classic shapes project stability, trustworthiness, and professionalism. Their straight lines offer a more traditional and structured look.
- Pinwheel/Multi-Faceted Signs: These are dynamic and give you visibility from several angles at once. They’re a great option for island booths sitting at busy aisle intersections.
- Custom Shapes: If you really want to be remembered, a sign shaped like your logo or a key product can become an unforgettable landmark on the show floor. This is the best way to make your brand instantly recognizable.
The shape you pick should be a strategic choice that matches your brand’s personality and the location of your booth. By working with your design team and keeping these tips in mind, you can create a hanging sign that not only grabs attention but also sticks in people’s minds, turning that valuable foot traffic into solid leads.
Navigating Venue Rules Rigging and Logistics

A beautifully designed hanging sign is a fantastic tool, but it’s completely useless if it never leaves its shipping crate. Before you can wow attendees from across the hall, you first have to get through the maze of venue regulations, rigging contractors, and show logistics. This is where a little bit of planning saves you from a world of hurt.
Think of the convention center as its own kingdom with its own set of laws for anything hanging from the ceiling. Your absolute first step is to get your hands on the exhibitor manual or services kit. This document is your bible for what the venue allows—and what it forbids—for hanging signs for trade shows.
Ignoring this manual is probably the single biggest mistake you can make. It contains all the critical details on height limits, weight restrictions, and deadlines that can absolutely make or break your installation.
Decoding the Language of Rigging
When you finally open that exhibitor manual, you’ll run into specific terms that dictate how your sign gets into the air. Don’t let the jargon intimidate you; it all comes down to safety and making sure everyone gets a fair shot at being seen.
Here are the key terms you really need to know:
- Rigging: This is just the overall process of hoisting and suspending your sign from the convention hall’s ceiling structure. It involves a lot of cables, motors, and specialized gear.
- Rigging Points: These are the specific, pre-approved spots on the ceiling grid where your sign can be hung. You can’t just hang a sign anywhere; it has to attach to these load-bearing points.
- Load Capacity: This is simply the maximum weight a rigging point can safely hold. Your sign’s total weight, including any lights or motors, has to be well under this limit.
- Sightline Restrictions: These are the rules of the road that make sure your sign doesn’t block the view of another exhibitor’s sign. They usually dictate maximum heights and where you can place the sign relative to your booth’s borders.
The most crucial takeaway is this: you are not allowed to hang your own sign. For very serious safety and liability reasons, all overhead rigging must be done by the official rigging contractor chosen by the venue or show organizer.
This contractor becomes your partner in the process. You’ll send them your sign’s specs and a detailed rigging plan for their approval, and you need to do it well before the show starts.
Managing Costs and Timelines
The logistics of hanging signs for trade shows involve more than just rules; they have a major impact on your budget and schedule. Getting a detailed, all-in quote is essential if you want to avoid nasty surprises. For instance, it’s important to know the full scope of what you’re paying for. With our video walls, we make a point to include everything in our price except for direct show bills. This gives you a clear budget from the start, which is a sharp contrast to other services where hidden fees can pile up fast.
Beyond the sign itself, you’re going to get billed for several different services. These often include:
- Labor: You’ll pay an hourly rate for the riggers who put your sign up and take it down. Be very aware of overtime charges for work done outside of normal business hours.
- Equipment Rental: This can include the motors, hoists, and trusses needed to get your sign in the air.
- Drayage: This is the material handling fee for moving your sign from the loading dock to your booth space and back again.
To stay on track and on budget, you have to start this process early. For a deeper look at the entire process from the ground up, our guide on exhibition stand building can offer some valuable context. Make sure you submit your rigging plans by the deadline. This locks in better rates and ensures the crew and equipment will actually be available. Missing those deadlines can lead to rush fees that can sometimes double your costs.
Hanging Signs for Trade Shows
Of course, every marketing manager is going to get asked the big question: “Is a hanging sign really worth the money?” It’s a fair question. To get that budget approved, you have to show it’s more than just a pretty decoration. You need to break down the real costs and connect that spending to actual results.
A hanging sign isn’t just about looking good; it’s a powerful magnet for pulling attendees to your booth and bringing in leads. First, let’s get a handle on what you’re actually paying for. The total price isn’t just the sign itself—it’s a whole package of services that makes that big, beautiful sign a reality.
Unpacking the Full Cost of a Hanging Sign
When you’re budgeting for a hanging sign, you have to think about a few different line items. If you miss one, you can get hit with some nasty surprise bills that will blow your budget out of the water.
Here’s what you can typically expect to pay for:
- Fabrication: This is the cost to actually make the sign. It covers the frame, the printed fabric graphics, and any lighting inside.
- Design: You’ll have fees for a graphic designer to create the artwork that fits the sign’s specific template.
- Shipping & Drayage: This covers getting the sign to the convention center and, more importantly, the mandatory fee to have the show’s crew move it from the loading dock to your booth space.
- Rigging & Labor: Like we’ve talked about, you have to hire the official show contractor for installation and teardown. This is often the biggest cost, billed by the hour, and can rack up serious overtime charges if you’re not careful.
One thing we really believe in is price transparency. A critical factor in your budgeting should be all-inclusive pricing where everything is covered except for the bills you pay directly to the show, like rigging. This way, you know the real cost upfront and can manage your budget without worrying about hidden fees.
Proving the Value and Calculating ROI
Once you have a clear picture of the total cost, you can figure out its return on investment (ROI). The whole point is to prove the sign did more than just hang there looking impressive; you want to show it actively helped you hit your goals. This means you need to set some clear, measurable targets before the show even starts.
Don’t just hope for more foot traffic—get specific. For instance, you could aim to increase qualified booth visits by 25% compared to your last show where you didn’t have a hanging sign. Or, you could set a target for a specific number of leads that came directly from the sign’s visibility.
You can easily track this by having your booth staff ask a simple question: “How did you find us today?” When you add up all the people who say, “I saw your sign from across the hall,” you have direct proof of its impact.
A simple formula to get started is:
(Gain from Investment – Cost of Investment) / Cost of Investment
The “Gain from Investment” is the value of the new business you landed. Let’s say your sign cost a total of $10,000 (fabrication, rigging, the works) and you brought in $50,000 in new business from leads who saw the sign. Your ROI would be a massive 400%. When you can show numbers like that, your budget request for the next show stops being a hopeful expense and becomes a proven way to make money.
The Future of Overhead Signage Integrated LED Video Walls
Traditional hanging signs are great for getting noticed from across the hall, but let’s be honest, they’re static. What if your sign wasn’t just floating above your booth, but actually was your booth? That’s the big shift we’re seeing right now—moving away from fabric banners and toward fully integrated LED video walls that make your entire structure a high-def display.
This isn’t just swapping out a sign for a screen. It’s a whole new way of thinking about your booth’s design as a tool for telling your story. Think of it like this: you can put a billboard on a building, or you can turn the entire face of the building into a massive digital screen like you see in Times Square. The impact is on a completely different level.
Instead of one static message hanging up in the rafters, the walls, arches, and even the counters of your booth become one seamless video canvas. This lets you grab attendees’ attention from anywhere on the floor with motion and color that a printed sign just can’t compete with.
The Critical Difference in Visual Quality
When you start looking at digital displays, you’ll quickly find that not all LED tech is the same. The most important thing to look at for visual quality is the pixel pitch—that’s just the distance in millimeters between the little LED lights (pixels) on the screen. A smaller pixel pitch means the pixels are closer together, which gives you a much higher-resolution image.
This technical detail makes a huge difference in the real world. A lot of companies in the trade show business use LED panels with a 2.5mm pixel pitch. It works, but up close, the image can look a little grainy or pixelated.
We only use a 1.9mm pixel pitch for our video walls. That gives you a 30% finer resolution, creating a dramatically sharper and more professional image that makes your brand look its best.
That superior clarity means your logos are razor-sharp, your text is easy to read, and your videos look smooth and lifelike. With higher resolution, you can run detailed product demos and create really immersive visuals that pull people in from far away and keep them hooked once they’re in your booth.
Simplifying Your Budget with All-Inclusive Pricing
Beyond just looking great, one of the biggest headaches with advanced booths is trying to manage a complicated and unpredictable budget. You get one quote for the booth structure, then a separate bill for labor, another for shipping, and a dozen other little things that can add up fast.
We think there’s a much more straightforward way to do it. We’ve set up our pricing to be as all-inclusive as possible so you have total certainty about your budget right from the start.
When you get a quote from us for an LED video wall booth, it includes:
- The complete LED wall structure.
- All the hardware, processors, and cables needed to run it.
- Shipping and transportation to the show venue.
- All the labor for both installation and dismantle.
The only costs not in our quotes are the bills you’d be paying directly to the show anyway, like rigging, electricity, and internet. This transparent approach gets rid of the risk of hidden fees and surprise charges, which is a common frustration in this industry. It lets you focus on your event strategy, not on trying to figure out a confusing invoice.
Choosing an integrated LED display is more than just a modern look; it’s a strategic move. You’re investing in a powerful tool that guarantees you’ll be seen, delivers your message with incredible clarity, and makes the budgeting process a whole lot simpler. To see how these dynamic structures can transform your trade show presence, you can learn more about our LED video wall rental solutions and see what’s possible.
Your Essential Hanging Sign Planning Checklist
Getting a hanging sign approved and installed at a trade show isn’t something you can do at the last minute. In fact, it requires a lot of careful planning months in advance. One wrong move, and you could be looking at massive rush fees, breaking show rules, or worse—not being allowed to hang your sign at all. This checklist will walk you through the process, step-by-step, to make sure everything goes smoothly.
The whole world of trade show signage has changed over the years. We’ve gone from simple banners to these incredible, dynamic experiences that are woven right into the booth itself. This timeline gives you a good idea of how much things have evolved.
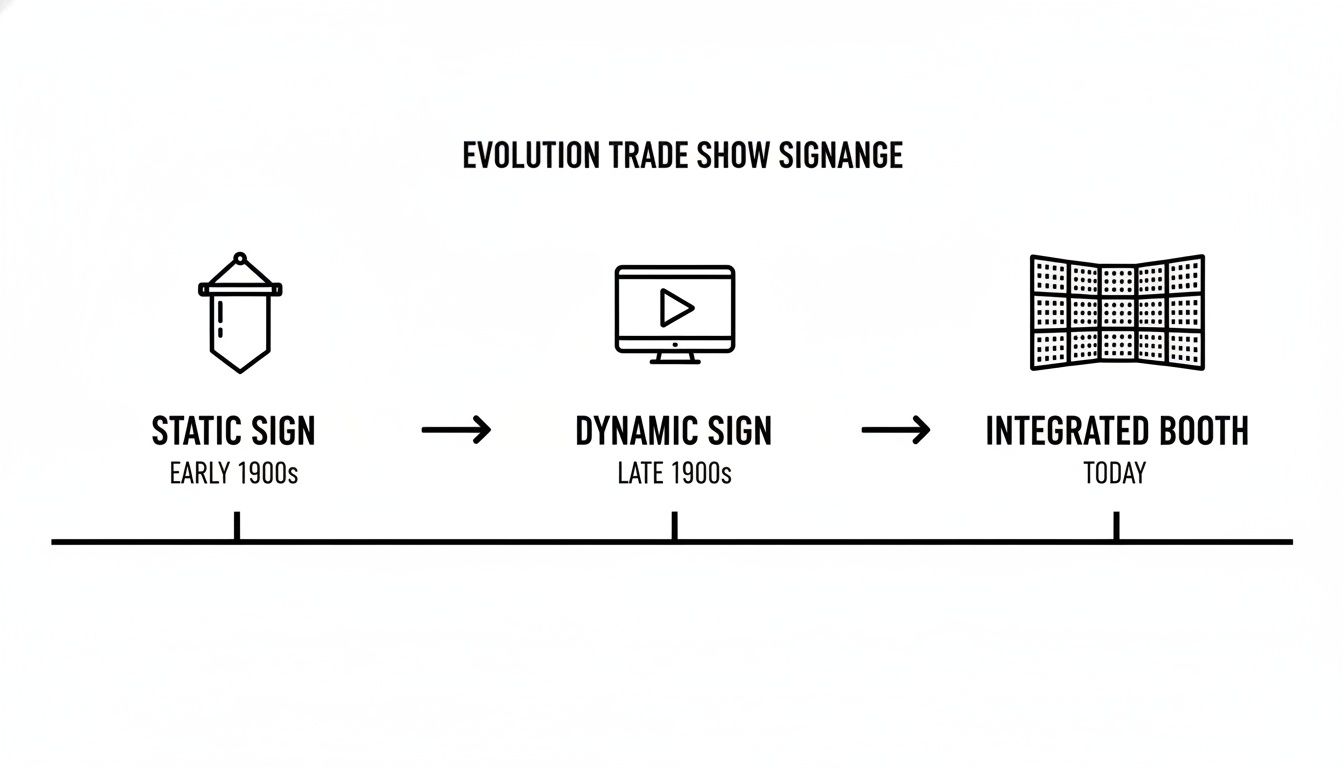
It’s pretty clear that the trend is moving away from just getting your name seen. Now, it’s all about creating an entire brand experience that pulls people in.
6+ Months Out: Initial Research
Your homework starts the second you book your booth. Seriously, don’t put this off.
- Review the Exhibitor Manual: Find and download the show’s exhibitor manual. You need to read every word in the sections on hanging signs, rigging, and sightlines. Look for all the details: height restrictions, weight limits, and any rules about how far your sign must be from the aisle.
- Identify the Official Contractor: The show will have an exclusive rigging contractor. You have to use them. Find their contact info, as they’ll be your go-to for installation and any technical questions.
4 to 5 Months Out: Design and Quotes
Now it’s time to get your vision down on paper and figure out the numbers.
- Finalize Sign Design: Work with your design team to create a sign that looks amazing but also follows every single rule from the manual. For a hanging sign, the key is a big, bold logo and as little text as possible so people can read it from across the hall.
- Obtain Quotes: Get detailed quotes for everything: making the sign, shipping it, and the rigging labor. If you’re considering an LED video wall, make sure you know exactly what’s included. We make this simple by offering all-inclusive pricing that covers everything except the direct show bills. This way, you know your budget is solid. Plus, our 1.9 pitch displays offer a much sharper image than the common 2.5 pitch you see elsewhere.
2 to 3 Months Out: Submissions and Approvals
This is where you make it official. Hitting the deadlines here is absolutely critical if you want to avoid late fees.
Submit your completed rigging plan, including the sign’s final weight and dimensions, to the official show contractor before the early-bird deadline. This one step can literally save you hundreds, or even thousands, of dollars.
Don’t move on to the next step until you have written approval from the contractor.
1 Month Out: Final Logistics
With the show just around the corner, it’s time to lock down all the final details.
- Confirm Shipping and Drayage: Set up shipping for your sign to the advance warehouse. You’ll also need to confirm the drayage (that’s the material handling fee) for getting the crate from the loading dock to your booth space.
- Schedule Installation: Get in touch with the rigging crew and nail down the exact date and time for your sign installation.
On-Site: Final Execution
When you get to the show floor, your job is to make sure everything goes according to plan. Be there to supervise the rigging crew during the setup. Once it’s up, test any lights or electrical parts and double-check that the sign is hanging at the approved height and in the correct spot.
Hanging Signs for Trade Shows FAQ
When it comes to hanging signs at trade shows, you’re bound to have questions. It’s a world filled with rigging rules, design choices, and a whole lot of details you have to get right for a successful show. Let’s tackle some of the most common questions we hear from exhibitors.
A big question is always how to make a huge impact without a huge budget. Of course, traditional hanging signs work, but newer tech offers much more exciting solutions. For instance, instead of a simple static sign, you can make your entire booth a moving, dynamic display with an integrated LED wall.
This approach actually makes budgeting simpler. Our model wraps everything—the structure, the labor, and the transport—into a single price. The only extra costs are what you pay the show directly for things like electricity. It’s a great way to avoid those nasty surprise fees.
How High Should a Hanging Sign Be
Figuring out the right height for your hanging sign is a balancing act between the venue’s rules and making sure people can actually see you. Most convention centers set a maximum height limit, often somewhere around 20 to 30 feet from the floor to the very top of your sign. You want to get high enough to be seen over your neighbors but still be visible from the main aisles.
Your first step, always, is to read the exhibitor manual. That document is your bible for the specific “floor to top of sign” rules and, just as importantly, the sightline regulations that stop you from blocking another exhibitor’s view. Your final rigging plan has to follow these rules to the letter.
Can I Use a Digital Screen as a Hanging Sign
Yes, and using digital screens as hanging signs is getting more popular every year. It’s an incredible way to stand out with content that moves and changes. However, it definitely adds a few more layers of complexity. You have to think about the screen’s weight, how much power it needs, and even the heat it might put out.
The venue’s official rigging contractor has to sign off on the total weight and the hanging method. A much more modern way to do it is to build LED video walls right into your booth’s structure. This effectively turns your whole exhibit into the sign and often lets you skip the hassle of separate, complicated overhead rigging.
We specialize in these integrated systems and use a superior 1.9 pitch for our video walls. Competitors often use a 2.5 pitch, meaning our screens deliver a significantly higher resolution for sharper, more professional visuals that make your brand look its best.
What Is the Biggest Mistake Exhibitors Make
The single most common and costly mistake is not reading the exhibitor services manual—and not reading it thoroughly right at the beginning of the planning process. This one oversight leads to all kinds of problems, like designing a sign that’s too big, too heavy, or breaks the sightline rules.
The fallout can be rough. It can mean paying for expensive, last-minute changes on-site or, in the worst-case scenario, being told you can’t hang your sign at all. A close second is trying to cram too much text onto the sign. From a distance, it just becomes an unreadable blob, which completely defeats the purpose of having a long-range beacon for your brand.
Ready to create a trade show presence that can’t be ignored? At LED Exhibit Booths, we transform your entire booth into a seamless, high-resolution video canvas that captivates attendees from every angle. turnkey LED video wall